Gear doesn’t win raids, alignment does.
Every loadout decision in Arc Raiders compounds. Your weapon determines how you handle encounters. Your skill allocation controls how fast you move and how much you can carry. Your augment tier defines how much you can protect before extraction. Most guides treat these as separate choices. They’re not - and building them out of sync is the fastest way to bleed credits and stall on progression.
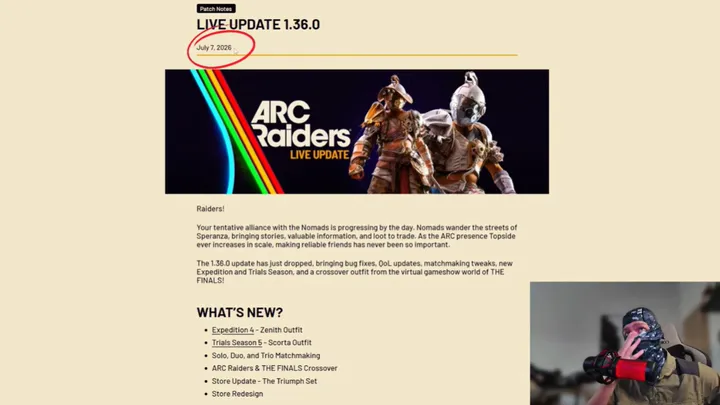
This guide covers the best Arc Raiders loadouts for the current meta, updated through Patch 1.29.0 (May 19, 2026). Verify specific numbers in-game before committing expensive materials to a new build - balance passes happen regularly.
Table of Contents
- What Changed in Recent Patches
- Pick Your Playstyle First
- Best Loadouts by Playstyle
- Match Your Loadout to the Map
- Boss and Elite ARC Weapon Guide
- Skill Tree: Universal Picks and Gotchas
- Augments: What Each Tier Changes
- Safe Pockets
- Workshop Upgrade Priority
- When to Fight vs When to Run
- Co-op Loadout Balance
- Gear vs Skill Investment by Stage
- Key Takeaways
- FAQ
What Changed in Recent Patches
Before using any older loadout guide, check your sources against these changes. Several weapons and systems shifted significantly between the Riven Tides update (1.26.0, April 28) and the latest balance patch (1.29.0, May 19).
Bettina (AR): Heavily buffed in 1.26.0 - base damage raised 14→16, fire rate interval cut 285→235, ARC armor damage up 33%, dispersion reduced ~40%. A minor fire rate nerf followed in 1.29.0, returning the interval to 250. Still firmly A-tier and the best PvE secondary in the game - the 1.26.0 buff was large enough that the 1.29.0 adjustment didn’t change its standing.
Photoelectric Cloak: Weight tripled (1→3) and power drain quadrupled (2.5/s→10/s) in 1.26.0. Then in 1.29.0, power drain was halved back to 5/s after player feedback. It’s more viable now than it was immediately post-Riven Tides, but the weight increase is permanent. Short to medium bursts rather than prolonged cloaking.
Venator: Nerfed in Patch 1.17.0, following an earlier nerf back in Patch 1.3.0 - Embark’s dev notes describe this as “taking a second stab” at the weapon after it remained one of the highest-performing guns in PvP. The patch touched both damage and headshot multiplier; exact figures aren’t consistently documented across sources, so treat any specific numbers with caution and verify in-game. Still functional, no longer the dominant pick it was at launch.
Stitcher: Headshot multiplier dropped 2.5→1.75 in Patch 1.17.0. Still the best CQB finisher - the nerf matters less at the body-shot distances where it’s actually used.
Kettle: Damage nerfed 10→8.5 in Patch 1.17.0. Still the best free loadout primary, slightly less punishing on tap-fire.
Weapon durability overhaul (1.26.0): Rarity now meaningfully affects how fast a weapon degrades per shot. Higher rarity gear lasts significantly longer per run. The gap between legendary and common tier is real - worth factoring into boss runs specifically.
New in 1.29.0: The Rascal grenade launcher added as a lightweight anti-ARC secondary - a compact alternative to the Hullcracker. Nomadic Envoy Ermal arrived as a new trader (requires Level 25), offering Expedition Vault access, stash upgrades, blueprints, and rotating weekly stock. Combat Mk.3 Flanking augment now accepts Medium Shields. Tactical Mk.3 Healing reworked to AoE healing, increased from 20 to 45, with cooldown extended from 30s to 45s.
Pick Your Playstyle First
You have 76 base skill points to distribute across three branches: Mobility, Conditioning, Survival. Hybrid builds spread those points too thin and underperform at everything. A skill reset costs 2,000 credits. Commit to a direction before investing past the four universal picks covered in the skill tree section below.
Use the free Kettle + Stitcher loadout to test playstyles before spending a single skill point. It costs nothing to lose and tells you within a few runs whether you want to push fights or avoid them.
| Playstyle | Primary | Secondary | Augment Path | Skill Split (Mob/Con/Sur) |
|---|---|---|---|---|
| Aggressive PvP | Tempest or Bobcat | Stitcher | Combat Mk.1 → Mk.3 | 45/23/7 |
| Cautious Extractor | Ferro or Renegade | Stitcher or Osprey | Looting Mk.1 → Mk.3 | 30/15/30 |
| Loot Runner | Ferro | Kettle | Looting Mk.2+ | 20/10/48 |
| PvE Farmer | Hullcracker | Bettina | Looting Mk.1 | 30/15/30 |
| Budget / New Player | Kettle | Stitcher | Any Mk.1 | 35/20/20 |
Best Loadouts by Playstyle
Aggressive PvP: Tempest + Stitcher
The Tempest handles medium-range pressure; the Stitcher closes anything that gets inside that range. Start on the Bobcat while learning fight reads - it’s more forgiving at mixed ranges - then move to Tempest once you’re making consistent engagement decisions. For dedicated CQB breachers, the Il Toro shotgun eliminates shielded targets in two to three shots, but requires getting inside close range before the target can back-pedal.
Hard counter: Both the Tempest and Bobcat lose to a Renegade or Osprey player with high ground and distance. If you can’t close the gap, disengage. Don’t trade at long range with an aggressive build.
| Slot | Item | Notes |
|---|---|---|
| Primary | Tempest (AR) | Reliable medium-range DPS, steady output |
| Secondary | Stitcher (SMG) | CQB finisher |
| Augment | Combat Mk.3 | Passive health regen, extra grenade slot, strong shield support |
| Shield | Medium | Balance of protection and movement |
| Grenades | Frag x2, Smoke x1 | Smoke for disengaging losing fights |
| Healing | Med Kit x2, Bandage x3 |
Skill priority: Marathon Runner and Youthful Lungs first. Then Effortless Roll - reduces dodge roll stamina cost. Some player testing puts the usable roll count at full stamina around 7 without the skill, rising to roughly 11 at max investment, though this figure isn’t officially confirmed and other testers report diminishing returns past 3 points - the official wiki itself flags these thresholds as community-tested estimates, not verified numbers. Worth testing in-game before committing all 5 points; 1-3 may capture most of the benefit. Pair whatever you invest with Carry the Momentum for free sprinting after a dodge. Fight or Flight recovers stamina when hit by players - note it only triggers from player damage, not ARCs. Dead weight on PvE runs.
Consistent All-Rounder: Anvil + Stitcher
The Anvil’s single-shot damage and armor penetration work in both PvP and PvE without needing to swap builds between raids. The key advantage is entering without knowing what you’ll face and having a credible answer to it. The Stitcher covers the close-range gap the Anvil can’t cleanly handle.
| Slot | Item | Notes |
|---|---|---|
| Primary | Anvil | High damage, strong armor pen, mid-to-long range |
| Secondary | Stitcher | CQB cleanup |
| Augment | Combat Mk.2 | Balanced survivability |
| Shield | Medium | |
| Grenades | Frag x2 | |
| Healing | Med Kit x2, Bandage x3 |
Skill priority: Universal picks first, then Loaded Arms in Conditioning (halves weapon weight impact on encumbrance). Note: Calming Stroll regenerates stamina while walking - it requires your dedicated walk key to be bound and active. Default jogging doesn’t trigger it. Bind the key before spending the point.
Long-Range: Renegade + Ferro
The Renegade’s single-shot damage punishes anyone caught in the open. The Ferro handles medium-range trades when pushed - its opening shot punishes aggressive players who rush without cover, meaning you win every trade where an enemy is running toward you, which describes most aggressive players you’ll face.
Hard counter: Miss the first shot and you’ve given away your position. Run Ferro as your primary until your long-range aim holds under pressure before committing to this pairing.
| Slot | Item | Notes |
|---|---|---|
| Primary | Renegade (Lever-Action BR) | Massive single-shot damage at range |
| Secondary | Ferro (Battle Rifle) | Medium-range fallback, strong armor pen |
| Augment | Combat Mk.2 | Survivability for repositioning retreats |
| Shield | Light or Medium | Prioritize mobility |
| Grenades | Smoke x1 | Covers repositioning after a shot |
| Healing | Med Kit x2, Bandage x3 |
Skill split: Mobility 50 / Conditioning 15 / Survival 10. Prioritize sprint speed for repositioning and stamina for holding angles.
PvE Farmer: Hullcracker + Bettina
The strongest setup for clearing ARC units and the current choice for the Riven Tides ARC Turbine boss. The Hullcracker delivers explosive damage to groups and large targets; the post-buff Bettina covers single targets, corridors, and add clear. It’s the only AR with meaningful ARC armor penetration built into its base stats.
Don’t run this against players - the Hullcracker has long reload cycles and punishes badly in CQB.
The Rascal (added in 1.29.0) is worth knowing as a lighter Hullcracker alternative for players who don’t want the weight commitment on loot-focused runs. Verify it fits your specific farming routes before swapping - the Hullcracker’s explosive radius on grouped ARCs is hard to replace on dense-spawn maps.
| Slot | Item | Notes |
|---|---|---|
| Primary | Hullcracker (Grenade Launcher) | Best PvE weapon; explosive damage on ARC groups and bosses |
| Secondary | Bettina (AR) | A-tier post-buff; only AR with strong ARC armor pen |
| Augment | Looting Mk.1 (safe farming) or Combat Mk.3 (boss runs) | |
| Shield | Medium | Tank ARC swarms |
| Consumables | Heavy Ammo x80, Grenades, Powercell Recharges | Non-stop ARC pressure |
Skill split: Mobility 30 / Conditioning 15 / Survival 30. Key picks: Marathon Runner, Youthful Lungs, Looter’s Instincts, Broad Shoulders.
Budget: Ferro + Stitcher (~500 Credits)
Ferro + Stitcher is the most played budget pairing - the Ferro opens at medium range, the Stitcher finishes close. Both are Common rarity, cheap to craft, and cheap to lose. This pairing outperforms expensive alternatives in the hands of a player who fires the Ferro first before swapping. The credit cost doesn’t cap the ceiling - your execution does.
Run the free Kettle + Stitcher loadout while saving credits. One tip most players miss: when you extract with a Free Loadout Augment, you can exchange it with Lance for a Mk.1 augment. Keep spares in your stash and trade them in rather than leaving that value on the table. Once you have ~300 credits, upgrade to Ferro as your primary.
| Slot | Item | Cost |
|---|---|---|
| Primary | Ferro | ~300 credits |
| Secondary | Stitcher | ~200 credits |
| Augment | Mk.1 (any) | Cheap materials |
| Shield | Light | Save weight |
| Consumables | Herbal Medkits, Impact Grenades | Low cost, consistent value |
Credit-buffer rule: If you can’t afford to lose this loadout twice in a row, it’s too expensive for where you are. Budget builds remove that pressure entirely.
Match Your Loadout to the Map
The map you’re running changes which loadout is worth bringing - different player density, ARC spawn rates, and engagement ranges demand different tools.
| Map | Player Density | Recommended Loadout | Why |
|---|---|---|---|
| Spaceport | High | Aggressive PvP (Tempest + Stitcher) | Close corridors, high player traffic, fast CQB engagements |
| Blue Gate | High | Aggressive PvP or All-Rounder | Mixed range encounters, frequent player fights |
| Dam Battlegrounds | Low-Medium | PvE Farmer (Hullcracker + Bettina) | ARC-dense, lower player pressure, good blueprint farming |
| Buried City | Low-Medium | PvE Farmer or Budget | Tight corridors, ARC-heavy, fewer player fights |
| Stella Montis | High | Long-Range (Renegade + Ferro) | Open sightlines, highest player density in the game |
| Riven Tides | Medium | PvE Farmer | ARC Turbine spawns here most frequently; armor pen essential |
One rough rule: if the map shows high player density in the pregame screen, bring a PvP loadout. If it shows low, lean PvE and loot. Mixing the wrong loadout into the wrong map is how you end up either over-geared for encounters that never happen or under-equipped for the ones that do.
Boss and Elite ARC Weapon Guide
With the ARC Turbine added in Riven Tides and the Bettina buffed alongside it, matching weapons to specific bosses is worth knowing before entering a high-ARC map.
| Enemy | Primary Weapon | Secondary | Notes |
|---|---|---|---|
| ARC Turbine | Hullcracker | Bettina | 4-5 Hullcracker shots in the landing window; Bettina for sustained fire between landings |
| Matriarch | Hullcracker | Ferro | Body shots from cover; retreat and repeat between volleys |
| Bombardier | Ferro | Hullcracker | Ferro destroys artillery pods first; Hullcracker for body shots |
| Bastion | Ferro | Any | Armor penetration from range; avoid CQB engagement |
| Fireball / Flying ARC | Ferro | Rattler | One Ferro shot eliminates propellers; Rattler cleans swarms |
| Tick swarms | Rattler | Stitcher | High fire rate needed; don’t waste Hullcracker ammo on small targets |
Run epic or legendary tier weapons on boss encounters where possible. After the Riven Tides durability overhaul, higher rarity means meaningfully less degradation per shot on extended fights - common tier loses durability at a rate that becomes expensive across a full boss run.
Skill Tree: Universal Picks and Gotchas
Take These Four First on Every Build
Marathon Runner (Mobility) - Reduces stamina cost of moving. First pick, every build, no exceptions.
Youthful Lungs (Mobility) - Raises maximum stamina. Combined with Marathon Runner, adds roughly 5 extra seconds of sprinting per engagement.
Looter’s Instincts (Survival) - Containers reveal loot faster. One point, immediate payoff on every single run.
In-Round Crafting (Survival) - Craft bandages, shield recharges, and grenades mid-raid. Removes the need to pre-craft every consumable before deploying.
After these four, invest by archetype. Aggressive: Effortless Roll then Carry the Momentum. Loot: Broad Shoulders (+2kg per point, +10kg total at max) then Looter’s Luck (~1-in-4 chance to reveal twice as many items) then Security Breach at 36 Survival points to open locked loot rooms.
Skill Gotchas Worth Knowing Before You Spend Points
Several skills behave differently from what their descriptions suggest. These are the ones that catch players out:
Calming Stroll only activates while using the dedicated slow-walk key - not while jogging, which is the default movement speed. If you haven’t bound your walk key, this skill does nothing. Bind the key first.
Fight or Flight only triggers when hit by other players, not ARC enemies. Strong in PvP engagements, completely useless on PvE-focused runs.
Effortless Roll gives you an extra usable dodge roll at 3 points by most player testing, with further stamina efficiency claimed at points 4 and 5. These thresholds come from community testing, not official numbers - some testers report meaningful gains up to 5 points, others report sharp diminishing returns after 3. Test it yourself in-game before locking in all 5 points.
Broad Shoulders gives exactly +2kg per point, +10kg at max. Simple, but worth knowing before you calculate carry weight targets for a loot run.
Looter’s Luck has roughly a 1-in-4 trigger rate per container. High variance on any individual run, but meaningful when averaged across many raids.
Three Deep Breaths doesn’t increase stamina regeneration after ability drain - it decreases the cooldown before you can perform that action again. Read the description carefully before buying.
A Little Extra generates basic materials (metal, Arc Alloy) when breaching objects. Not useful enough to prioritize early.
Augments: What Each Tier Changes
Augment tier determines carry weight, shield compatibility, safe pocket count, and passive bonuses. This matters more than weapon rarity for most of early and mid progression - a Mk.3 augment on budget weapons outperforms Mk.1 augments on expensive weapons most of the time.
Safe pocket count is not a clean function of Mk tier - it’s set per specific augment, so two Mk.3 augments can have different pocket counts. As a general trend, higher tiers average more pockets, but check the individual augment before assuming:
| Tier | Rarity | Typical Safe Pockets | Key Unlock | Best For |
|---|---|---|---|---|
| Mk.1 | Common/Uncommon | 1 (most variants) | Basic augmented slot | First 10-15 runs |
| Mk.2 | Rare | 1-2 depending on variant | Passive perks, augmented slots | Mid-game power jump |
| Mk.3 | Epic | 1-3 depending on variant | 65-80kg carry, specialized identity | Endgame commitment |
At Mk.3, pocket count and perks vary sharply by variant. Combat Mk.3 (Aggressive/Flanking) sits at 1 safe pocket. Looting Mk.3 (Cautious) has 2. Only specific Mk.3 variants - Tactical Mk.3 (Healing), Tactical Mk.3 (Revival), and Looting Mk.3 (Survivor) - reach 3. Don’t assume pocket count from the Mk number alone; check the augment’s own stat sheet.
At Mk.3 the build splits into several distinct archetypes:
Combat Mk.3 (Aggressive/Flanking) - Passive health regen at 1 HP per 5 seconds, pausing for 30 seconds after taking damage. Best for PvP - the regen removes the need for constant healing in drawn-out fights. After the 1.29.0 change, the Flanking variant now accepts Medium Shields, giving it better survivability than before. Note: this 1 HP/5s passive is shared across the Combat line starting at Mk.2, not unique to Mk.3 - the Mk.3 variants add other perks (Medium Shield access, extra grenade and weapon slots) on top of the same base regen.
Looting Mk.3 (Cautious) - 70kg carry capacity, 24 backpack slots, 2 safe pockets. Best for loot runners who want capacity without sacrificing a third safe pocket slot to get it.
Looting Mk.3 (Survivor) - 80kg carry capacity, 20 backpack slots, 3 safe pockets, plus a unique passive that regenerates up to 75% of downed health while stationary and downed. The higher carry weight and extra safe pocket make it the stronger pick for most dedicated loot runners.
Tactical Mk.3 (Healing) - Reworked in 1.29.0 to an AoE healing effect, with heal amount increased from 20 to 45 and cooldown extended from 30s to 45s. Worth reconsidering for squad play where the AoE can hit teammates.
Safe Pockets
There is no gear insurance in Arc Raiders. If you die in the field, your equipped loadout is gone. Safe pockets are the only protection - items placed in them return regardless of how the raid ends.
The Expedition Vault added in Patch 1.29.0 via Ermal (requires Level 25) lets you store up to 5 high-value items between raids - use it for Legendary schematics you’re not actively running. It doesn’t replace safe pockets during a raid. It supplements them for your most irreplaceable items when you’re back in base.
What to safe-pocket, in priority order:
- Keys - any key opens a locked room worth more than the key itself. Pocket it the moment you find it.
- Legendary schematics (orange/yellow items) - unlock permanent crafting recipes. Losing one is permanent progress loss that can’t be recovered.
- ARC Powercells - high value, hard to replace, worth protecting over most other loot.
- One Gun Parts stack - lets you repair your primary mid-raid if durability drops below a usable threshold.
Leave at least one safe pocket slot empty when deploying. You will find something worth protecting in the raid itself. Mk.1 augments give 1 safe pocket; Mk.3 augments provide 3-4.
Workshop Upgrade Priority
| Step | Upgrade | Why |
|---|---|---|
| 1 | Gunsmith → Level 2 | Biggest early power spike; unlocks better weapon mods and the Arpeggio I burst AR |
| 2 | Scrappy → Level 2 | Passive material income between sessions; pays back within 3-5 raids |
| 3 | Gear Bench → Level 2 | Unlocks the Heavy Shield and all Mk.2 augments (Combat, Looting, Tactical) |
| 4 | Gear Bench → Level 3 | Unlocks all Mk.3 augment recipes (Combat, Looting, Tactical) - not just one line, so this single upgrade opens your endgame augment of choice regardless of build |
| 5 | Medical Lab → Level 3 | Unlocks Vita Spray (instant healing); removes the pre-raid bandage-crafting routine |
Hold off on Explosives Station and Utility Station until mid-game unless you’re specifically building around grenades or the Photoelectric Cloak. The Cloak is more viable post-1.29.0 than immediately after Riven Tides (power draw halved back to 5/s), but the weight increase is permanent at 3 - factor that into your load capacity before committing the Utility Station investment.
When to Fight vs When to Run
Five consistent extractions generate more long-term progression than two great runs followed by three total losses. The decision is almost always simpler than it feels in the moment:
Fight if you’re at full health and shields, the target is solo, and you have more than 90 seconds before the last extraction closes.
Disengage if a teammate was just revived or is below half health. A weakened squad loses fights it should win - and losing costs everyone the entire run.
Never fight within 90 seconds of extraction with meaningful loot in your pack. Holster your weapon - movement speed increases holstered - and route directly to the exit.
Route around ARC patrols near extraction points rather than engaging them. Fighting at extraction draws other players to the noise at exactly the wrong moment.
Extract immediately if you’re solo against a full squad. No loot justifies a 3v1.
Co-op Loadout Balance
Three players on identical builds have no role differentiation. One ambush exposes it. Assign roles before deploying:
Anchor - Combat Mk.2+ augment, Il Toro + Stitcher. Takes point on breaches and absorbs damage while the squad repositions. Carries the team’s emergency healing in augmented slots.
Spear - Mid-weight build, Bobcat or Ferro primary. Mobile flanker - the Anchor pins, the Spear angles or closes the gap. Runs minimal healing since the Anchor covers revives.
Sweep - Looting Mk.2 augment, Bettina secondary for ARC armor pen. Handles utility (grenades, zipline) and PvE threats while Anchor and Spear manage players. Carries the squad’s best Legendary schematics in safe pockets.
Communication rule: call loot value before picking anything up. When two players want the same Legendary schematic, the player with fewer occupied safe pocket slots takes it.
Gear vs Skill Investment by Stage
Both cost resources. Most players underinvest in one because a guide told them to rush the other. The right answer depends on where you are in progression:
Early game (first 15 runs): Skills over gear. Craft Mk.1 augments from cheap materials (Rubber Parts + Plastic Parts) and push credits toward Workshop upgrades rather than augment tier. Skill investments compound across every run. An augment only delivers value when you survive to extract.
Mid game (5,000+ credits saved): Invest in Gunsmith Level 2, then craft Mk.2 augments matching your archetype. Your skill tree should be mostly committed by this point - a reset costs 2,000 credits, so lock in your direction before you reach Mk.2 gear.
Late game: Mk.3 augments require expensive materials and represent a long-term commitment. Run consistent lower-risk extractions to stockpile materials rather than high-risk deep dives that risk total loss.
Simple rule: if you can’t afford to lose your loadout twice in a row, it’s too expensive for your current credit buffer.
Key Takeaways
- Pick one playstyle before spending skill points past the universal four - hybrid builds underperform at everything
- Marathon Runner and Youthful Lungs are the highest-return skill investments in the game, on every build
- Ferro + Stitcher (~500 credits) outperforms expensive alternatives when you fire the Ferro first before swapping
- Bettina is the best PvE secondary post-Riven Tides buff - despite a minor 1.29.0 fire rate adjustment, it remains A-tier
- Match your loadout to the map - Dam Battlegrounds rewards PvE builds; Spaceport and Blue Gate reward PvP
- Augment tier matters more than weapon rarity for most of early and mid progression
- Safe pockets are your only gear protection - leave at least one slot open when you deploy
- The Expedition Vault (Ermal, 1.29.0, Level 25+) protects up to 5 items between raids - use it for Legendary schematics
- Five consistent extractions beat two great runs and three total losses every time
FAQ
What is the best loadout in Arc Raiders right now?
For most players, Ferro + Stitcher under 500 credits is the most reliable starting point - effective in both PvP and PvE and cheap to replace if you die. For dedicated PvP, Tempest + Stitcher with a Combat Mk.3 augment is the community-favored aggressive build. Anvil + Stitcher is the current consensus pick for players who want one setup that handles both playstyles without needing to swap between raids.
What is the best budget loadout in Arc Raiders?
Ferro + Stitcher at around 500 credits. The free Kettle + Stitcher loadout works while saving, but upgrade to Ferro once you have ~300 credits available. Both are Common rarity, cheap to craft, and punish aggressive players who push without cover. When you extract with a Free Loadout Augment, trade it to Lance for a Mk.1 augment rather than leaving the value behind.
What is the best PvE loadout for farming ARCs?
Hullcracker + Bettina. The Hullcracker handles groups and large ARC targets at mid-range; the Bettina covers single targets and corridors after its major Riven Tides buff. Run a Looting Mk.1 augment and invest in Broad Shoulders and Looter’s Instincts in the Survival tree to maximize loot per run.
What is the best weapon for the ARC Turbine boss?
Hullcracker for landing-window damage - aim for 4-5 shots while the Turbine is grounded. Use Bettina for sustained fire between landing phases. Run epic or legendary tier weapons where possible; the Riven Tides durability overhaul makes rarity meaningfully better for extended boss fights.
What skills should I max first in Arc Raiders?
Marathon Runner and Youthful Lungs in the Mobility tree, on every build without exception. These two combined add roughly 5 extra seconds of sprinting per engagement - the single biggest survival advantage in the early game. After those, invest by archetype: Effortless Roll and Carry the Momentum for aggressive PvP; Broad Shoulders and Security Breach for loot-focused builds.
Should I use a heavy shield or medium shield?
Medium shield in most scenarios. Heavy shields reduce your movement speed in a game where positioning determines who wins engagements. The protection increase doesn’t compensate for the mobility loss in PvP. Heavy shields are only situationally useful on dedicated PvE farming runs where player encounters are unlikely.
Is the Photoelectric Cloak worth running after the nerfs?
More viable than it was immediately after Riven Tides. Patch 1.29.0 halved the power drain back to 5/s from the 10/s it hit in 1.26.0. The weight increase (1→3) is permanent, so your carry capacity takes a hit. Short to medium bursts are viable; prolonged cloaking still isn’t worth the resource cost.
What should I always safe-pocket?
Keys first - any key opens a locked room worth more than the key itself. Then Legendary schematics, which unlock permanent crafting recipes and can’t be recovered if lost. Then ARC Powercells and one Gun Parts stack for mid-raid weapon repairs. Leave at least one slot empty before deploying.
How many skill points do you get in Arc Raiders?
76 base skill points distributed across three branches: Mobility, Conditioning, and Survival. Skill resets cost 2,000 credits. Commit to your archetype before investing past the four universal picks - hybrid builds underperform at everything.
Does weapon rarity determine how good a gun is?
Not directly. The Anvil is Uncommon rarity and sits in S-tier. The Stitcher outperforms higher-rarity weapons in sustained close-range fights. Rarity does affect durability loss per shot after the Riven Tides overhaul - legendary gear lasts significantly longer per run - but a well-played Common weapon beats a poorly-played Epic in most engagements.