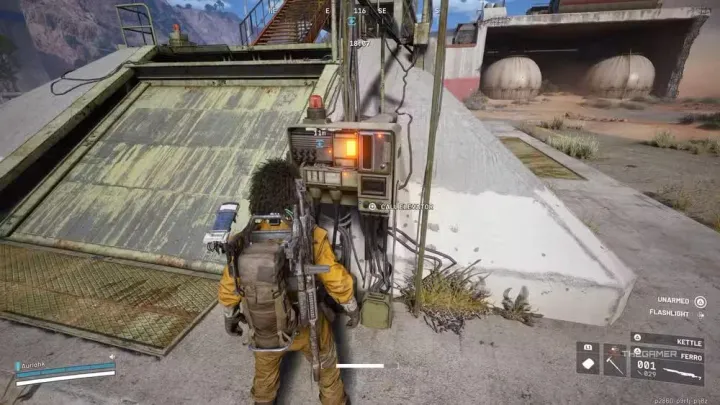
You’ve cleared half the map, your bag is stuffed with loot, and the timer just hit ten minutes left. Now the easy part is over: every Extraction Point on the map is either camped, closing, or both. Lose the wrong fight here and you walk back to Speranza with nothing. This guide covers every way to extract in Arc Raiders, how Raider Hatch Keys actually work, and a timing trick most guides never mention.
Table of Contents
- What Is an Extraction Point (and Why It Matters)
- The 4 Ways to Extract in Arc Raiders
- How Standard Extraction Works (Elevators, Metro Stations, Airshafts)
- How to Use a Raider Hatch
- When to Extract: A Timing Framework
- What Happens If You Don’t Extract in Time
- Beating the Clock at a Closing Extraction Point
- Extracting While Downed
- Extraction Points Aren’t Squad-Locked
- Common Extraction Mistakes to Avoid
- Key Takeaways
- Frequently Asked Questions
What Is an Extraction Point (and Why It Matters)
An Extraction Point is the only way to keep what you find Topside. Every raid drops you onto a surface map empty-handed, and everything you loot along the way only really becomes yours once you’ve physically carried it through a working Extraction Point and back to Speranza.
Die first, or run out of time first, and none of that matters. Extraction, not looting, is the actual objective of a raid. A Raider who finds the best gear on the map but never makes it home walks away with nothing to show for it.
There’s no single “extraction button.” Each map has several Extraction Points scattered across it, and they come in four different types with different costs, risks, and timing. Here’s how they break down.
The 4 Ways to Extract in Arc Raiders
Every raid lasts 30 minutes, and you need to reach a working Extraction Point before the clock runs out. There are four types of Extraction Points, and they don’t all work the same way.
| Extraction Point | Map Icon | Requires a Key? | Sounds an Alarm? | Closes on a Timer? |
|---|---|---|---|---|
| Cargo Elevator | Down arrow in a box | No | Yes | Yes |
| Metro Station | Train symbol | No | Yes | Yes |
| Airshaft | Fan symbol | No | Yes | Yes |
| Raider Hatch | Down arrow over a half-circle | Yes (Raider Hatch Key) | No | No, but only stays open ~10-15 seconds once unlocked |
Cargo Elevators, Metro Stations, and Airshafts all function the same way mechanically and just look different depending on the map. Dam Battlegrounds and Spaceport use Cargo Elevators, Buried City uses Metro Stations, and the Blue Gate uses Airshafts. Raider Hatches show up on every map and are the odd one out mechanically, so they’re worth understanding on their own.
How Standard Extraction Works (Elevators, Metro Stations, Airshafts)
These are the Extraction Points you’ll use most often, since they don’t cost anything to access.
- Open your map and look for the down-arrow, train, or fan icon. Each one shows a countdown for how much longer it stays available.
- Interact with the outer console to call the elevator, train, or airshaft. This triggers a loud alarm that’s audible to every player and ARC machine nearby.
- Find cover and wait. The alarm is the worst part of this method. Hide behind cover near the point rather than standing in the open while you wait, and bring a smoke grenade if you have one to obscure approach lines once the point arrives.
- Interact with the second console once the point arrives, or simply stay inside it. If nobody presses the console, the extraction starts automatically after about two minutes as long as you remain inside.
- Everyone inside extracts together. Only one person needs to activate the console, and this isn’t limited to your own squad. Any Raider standing inside the point when it activates, including a stranger who slipped in behind you, extracts safely too.
Once the countdown on a specific point hits zero, that point shuts down permanently for the rest of the raid. You’ll need to find another one. It’s also worth clearing out nearby ARC machines, especially flying units, before you call the point. The alarm draws in whatever’s nearby, so fewer threats in the area means a calmer wait.
How to Use a Raider Hatch
A Raider Hatch is marked on the map as a downward arrow with a half-circle underneath it, and every map has multiple hatches scattered across it. Unlike the standard points, a Raider Hatch terminal doesn’t have a visible shutdown timer of its own. That makes it reliable for late-raid escapes when every other point on the map has already closed.
The trade-off is the window once you actually use it. After you interact with the terminal using a Raider Hatch Key, the hatch opens for roughly 10 to 15 seconds before it seals again. There’s no alarm and no waiting around for a vehicle to arrive, but you need to be standing right there ready to go the moment it opens. Like standard points, one key opens the hatch for everyone nearby, not just the player who used it, though stragglers who aren’t close enough when it seals get left behind.
How to Get a Raider Hatch Key
Raider Hatch Keys are rare, and you’ll typically get one through one of four methods:
- Buy one from Shani. Once you hit level 12, Shani sells a single Raider Hatch Key for 9,000 Coins, with a 24-hour cooldown before she’ll sell another. This is the most predictable source if you’re willing to spend the Coins.
- Find one Topside. Keys can spawn as loot in Raider Stashes and containers across any map, though the drop rate is low enough that you shouldn’t plan a run around finding one.
- Loot one off another Raider. If you defeat another player, you can search their body for a key, unless they had it stored in their Safe Pocket, in which case it’s gone.
- Craft one. This requires a Utility Station upgraded to level 2 in your Workshop. Once that’s unlocked, the key itself costs 1x Advanced Electrical Components and 3x Sensors to craft. Worth noting: the Utility Station upgrade and the key recipe are two separate costs, and a few guides online mix the two together. The station upgrade is a one-time Workshop investment; the materials above are what you actually spend per key.
You’ll also get your first key for free by completing Shani’s Hatch Repairs quest, which doubles as an introduction to how the mechanic works.
Because keys are expensive or rare no matter how you get one, store it in your Safe Pocket rather than your regular inventory. If you’re using a Free Loadout with no Safe Pocket slots, anything you’re carrying, including a Hatch Key, is gone the moment you die.
When to Extract: A Timing Framework
Most guides just say “leave early,” but the actual reasoning matters more than the advice itself. Every raid gives you 30 minutes and multiple Extraction Points scattered around the map. As the clock runs down, points close one by one, which means the pool of remaining exits shrinks while the number of Raiders still trying to use them doesn’t.
- Early raid (20+ minutes left): Several points are open. This is the safest time to extract, but it also means you’re cutting your loot run short. Good for quest-item runs or when you’re already carrying something you can’t afford to lose.
- Mid raid (10-20 minutes left): Most experienced Raiders are still looting, so points are quieter but not empty. A reasonable balance between safety and time spent collecting loot.
- Late raid (under 10 minutes): Every surviving Raider on the map is now converging on whatever points remain open. Expect a fight, expect other squads to be doing the same math you are, and expect a truce with strangers to break the second someone sees an opening.
There’s no universally correct answer here. A Free Loadout run with nothing to lose can afford to push late for extra loot. A run where you’re carrying a quest item or rare materials should extract the moment a safe opportunity appears, since there’s nothing to gain by gambling at the end.
What Happens If You Don’t Extract in Time
When the raid timer hits zero, the map gets hit with a bombardment and every remaining player dies instantly, regardless of position or health. This is functionally the same as any other death: you lose everything you’re carrying except whatever’s in your Safe Pocket. There’s no special penalty beyond the standard loss, but there’s also no negotiating with the clock. If you’re not in or through an Extraction Point when it expires, the run is over.
This is exactly why loadout choice matters before you even head Topside. A loadout with Safe Pocket slots gives you a guaranteed way to protect your most valuable items even if extraction goes wrong. Our best loadout guide breaks down which Augments are worth the Safe Pocket trade-off.
Beating the Clock at a Closing Extraction Point
You’re sprinting for an Extraction Point with the countdown reading three seconds left, sure you’re already too late. There’s a window here that saves more raids than it should: Extraction Points won’t deactivate if you interact with the terminal in the instant before the shutdown timer hits zero. Time it right, and you survive into what’s effectively overtime on a point that should have already closed.
It isn’t a guaranteed save, since you still need to be standing at the terminal at the right second, but it’s worth attempting whenever you’re not sure you’ll make the deadline. Worst case, you’ve lost nothing by trying.
Extracting While Downed
A common myth floating around is that downed (DBNO) players can’t use Extraction Points, especially Raider Hatches. That’s incorrect. Downed Raiders can still interact with extraction terminals, including Raider Hatches, to make a safe escape. If a teammate calls an elevator or unlocks a hatch and you’re downed but able to crawl inside, you’ll extract along with everyone else as long as you’re in the point when it activates. Pulling this off even earns its own achievement, Not Over Til It’s Over.
That makes a downed teammate near an open Extraction Point a much better outcome than it sounds. Don’t write off the run just because someone’s knocked down if there’s a point within reach.
One more timing trick worth knowing: since it takes roughly 30-45 seconds total for someone to call a point, activate it, and have the doors close behind them, you can hide nearby with your light off, watch another Raider go through the process, and slip inside right before it seals to avoid the fight entirely.
Extraction Points Aren’t Squad-Locked
One thing worth being explicit about: extraction isn’t restricted to your own squad. One person interacting with the console is enough to extract everyone standing inside the point, whether or not they called it, whether or not they own the Raider Hatch Key in a hatch scenario, and whether or not they’re even in your party. A stranger who slips into an elevator you called, or who’s standing near a hatch when your squadmate uses a key, extracts right along with you.
Within your own squad, the practical upshot is that you don’t need every member carrying their own key or taking turns on consoles. What you do need is everyone actually inside the point before it activates, since stragglers outside the doorway when the countdown finishes don’t make the trip.
Coordinate over voice or pings before calling an extraction, especially with a Raider Hatch, since the short open window leaves almost no margin for a squadmate who’s still finishing a fight 30 meters away.
Common Extraction Mistakes to Avoid
- Fighting near an active elevator instead of taking cover. The alarm already told everyone where you are. Standing in the open just makes you an easier target while you wait.
- Carrying a Raider Hatch Key outside your Safe Pocket. If you die before using it, the key dies with you.
- Ignoring the countdown until it’s almost zero. Check Extraction Point timers periodically instead of finding out a point closed when you arrive.
- Committing to the last open point on the map. This is where most late-raid deaths happen, since every remaining player has the same idea at the same time.
- Forgetting that one console interaction extracts your whole squad. There’s no need to risk extra exposure waiting for everyone to “take a turn.”
- Assuming a downed teammate near a point is a lost cause. If they can reach the terminal, they can still extract.
Key Takeaways
- Arc Raiders has four Extraction Point types: cargo elevators, metro stations, airshafts, and Raider Hatches.
- Dam Battlegrounds and Spaceport use elevators, Buried City uses metro stations, and Blue Gate uses airshafts. Raider Hatches appear on every map.
- Standard points sound a loud alarm and close on a visible timer; Raider Hatches are silent but only stay open 10-15 seconds once unlocked.
- Raider Hatch Keys come from purchase (Shani, 9,000 Coins), loot, crafting (Utility Station 2, then 1x Advanced Electrical Components + 3x Sensors), or the Hatch Repairs quest.
- Interacting with a terminal right before shutdown can keep it active into overtime.
- Downed players can still extract through any Extraction Point, including Raider Hatches.
- Extraction points aren’t squad-locked. Anyone inside when a point activates extracts, not just your party.
Frequently Asked Questions
How do you extract in Arc Raiders?
Find an active Extraction Point on your map, interact with its console to activate it, then wait for it to arrive (or unlock it instantly with a Raider Hatch Key) and step inside before the window closes.
What are the different extraction points in Arc Raiders?
There are four types: Cargo Elevators, Metro Stations, Airshafts, and Raider Hatches. The first three function the same way and just look different depending on the map; Raider Hatches require a key but skip the alarm and wait time.
How long do you have to extract in Arc Raiders?
Each raid lasts 30 minutes. Individual Extraction Points have their own shorter countdown timers that determine when that specific point shuts down, so the safe window for any given point is usually shorter than the full raid.
What happens if you don’t extract in time?
The map gets hit with a bombardment when the raid timer hits zero, killing every remaining player instantly. You lose everything except items stored in your Safe Pocket.
How do you get a Raider Hatch Key?
Buy one from Shani for 9,000 Coins (level 12 required, one per 24 hours), find one as Topside loot, loot one from a defeated Raider, or craft one with a Utility Station 2 using 1x Advanced Electrical Components and 3x Sensors.
How long does a Raider Hatch stay open?
Once unlocked with a key, a Raider Hatch stays open for roughly 10 to 15 seconds before sealing again. There’s no advance warning timer like standard points have, so you need to be ready the moment you use the key.
Can you extract while downed in Arc Raiders?
Yes. Downed players can still interact with Extraction Point terminals, including Raider Hatches, to escape safely as long as they can reach the terminal in time.
Does an Extraction Point only work for your own squad?
No. Anyone standing inside an Extraction Point when it activates extracts safely, including strangers who aren’t in your party. One key or one console interaction is enough for everyone present, not just your squad.
What’s the safest way to extract in Arc Raiders?
Raider Hatches are generally the safest option since they skip the alarm and the wait, but they require a key you may not have on hand. Among standard points, extracting earlier in the raid is safer since more points are still open and fewer players are competing for them.
Do extraction points make noise?
Cargo Elevators, Metro Stations, and Airshafts all sound a loud alarm when activated that’s audible to nearby players and ARC machines. Raider Hatches are silent.
Can you craft a Raider Hatch Key?
Yes, but you need a Utility Station upgraded to level 2 first. Once that’s unlocked, crafting the key itself costs 1x Advanced Electrical Components and 3x Sensors.