Weekly ARC Raiders Trials look simple on paper: hit a number, extract, done.
But the players actually pulling max scores lean on a handful of specific techniques most raiders never test, from tapping probes to quick-killing a Queen with a stack of deadlines.
This trials guide breaks those techniques down by objective type, so you can push a real score into a single run instead of grinding raid after raid for scraps.
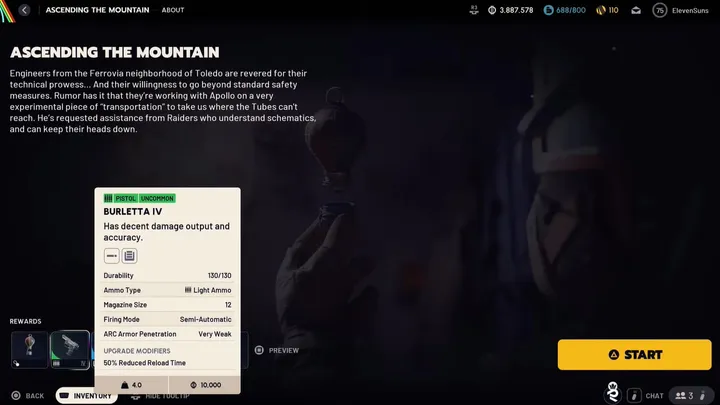
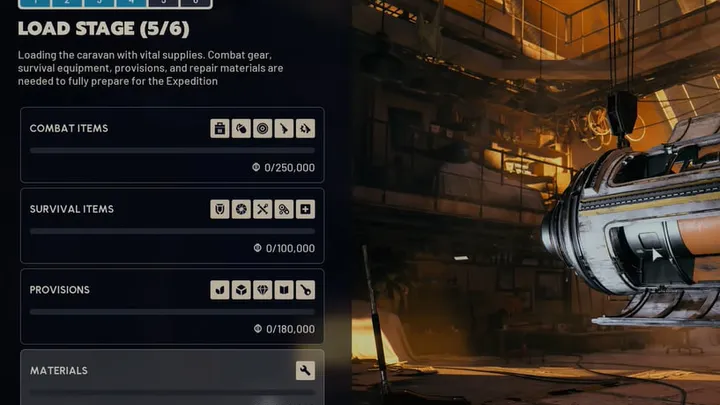
If you’re juggling this alongside the rest of Update 1.45.0, the Ascending the Mountain project and the Hornet Hunter Set are also worth a look.
Table of Contents
How Trials Scoring Works Right Now
Trials unlock once you hit character level 15, and from there the Trials tab sits under the Raider menu.
Each week hands out five objectives tied to specific enemy types or activities, and they rotate on a weekly reset.
Every point you earn during a raid only counts if you extract successfully.
Die, disconnect, or fail to make it out, and that run’s trial progress is gone.
Your tracked score for a trial is your single best extracted run, not a running total across every attempt.
A weak run does not hurt you, but it also does not stack on top of a good one.
Your rank is built from your combined personal bests across that week’s objectives, measured against roughly 99 other raiders on your board.
Climbing that board unlocks the season’s rank tiers, from Rookie and Tryhard up through Wildcard, Hotshot, and Cantina Legend.
One thing worth correcting if you have read older trials guides: earlier seasons doubled trial points during active Major Map Conditions like Night Raid, but that bonus was removed as part of the Riven Tides trials overhaul.
Do not build a run around chasing a map condition purely for a points multiplier that no longer exists.
Point totals also vary by objective and by week, since Embark adjusts the scoring formula on new or returning trials fairly often.
Check the live trial screen in-game for the exact rate before you commit a loadout to a specific strategy.
The current trials season closes out before September 22, ahead of the Frozen Trail update, around the same time Expedition 5 wraps up and unspent Cred expires, so treat any specific point totals you see referenced elsewhere as a snapshot of one week rather than a fixed rule.
Search ARC Probes: The Tap Method
This objective asks you to open panels on ARC Probes, and it is one of the more forgiving trials to run because it is not a zero-sum fight over a single boss.
The tap method is the standard approach.
Landed probes call in from the sky and normally sit on the ground for a few minutes before flying off again.
The moment you interact with a probe’s panel to start a breach, though, it stops that timer for good and stays grounded for the rest of the match.
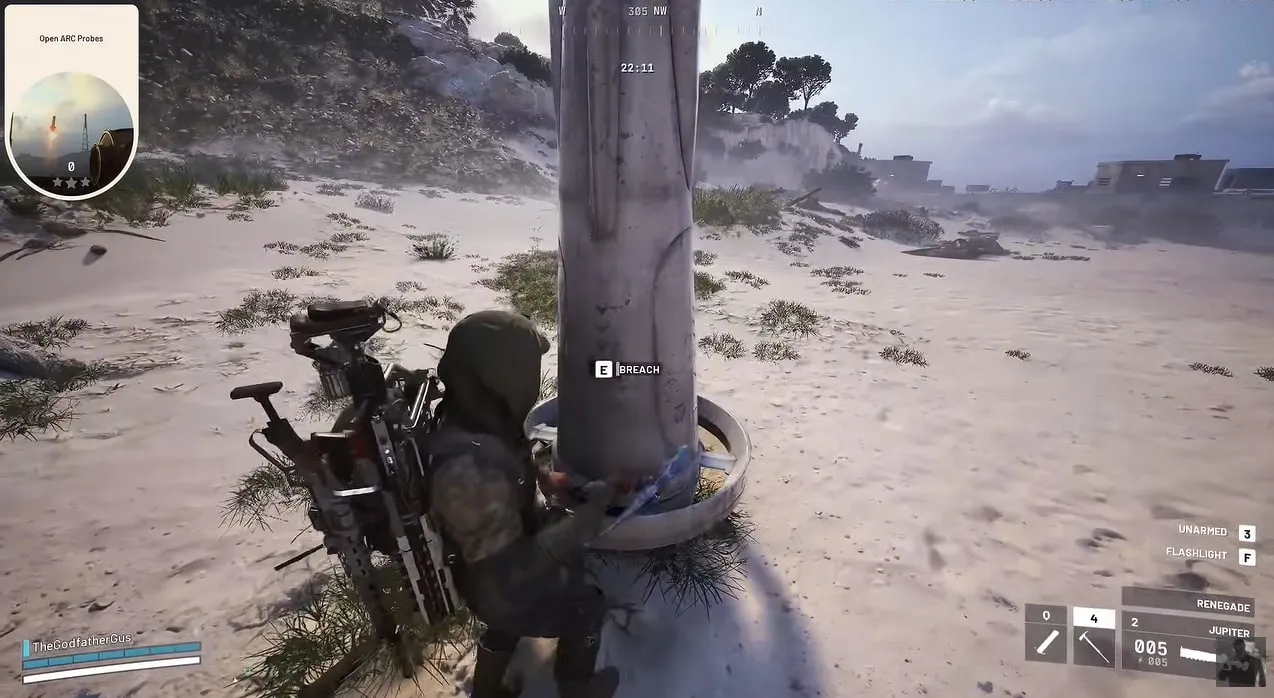
That is the trick: you do not have to fully breach a probe the first time you reach it.
Run to each probe as it lands, tap the panel just long enough to start the breach, and immediately move on to the next one.
Save the last stretch of the match, roughly the final ten to twelve minutes, to loop back through every probe you tapped and search all three panels on each.
Crashed probes scattered around the map count toward this trial too, so sweep those on your way between landed ones.
Bring enough mobility tools to cover ground fast, since you will be crossing a lot of the map twice.
On smaller, tighter maps you will need less traversal gear than on sprawling ones, so scout the map layout before you commit a loadout.
Damage ARC With Deadlines: Quick-Kill Techniques
Quick-Killing a Queen or Matriarch
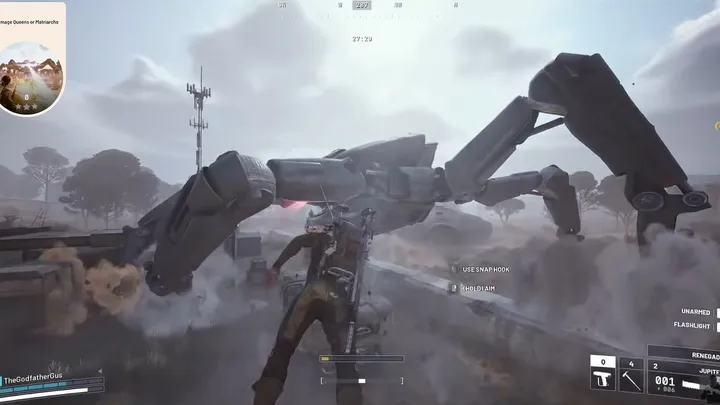
Killing a Queen or Matriarch outright with deadline explosives is far faster than whittling one down with normal weapon fire, and it is the technique serious trial runners lean on for damage-based objectives.
The core sequence is armor first, then core, then repeat.
Get to the boss first if you can, since a close spawn matters more than almost anything else in this strategy.
A Queen or Matriarch that other raiders have already engaged will not give you a clean run.
Snap or grapple onto the top of the boss and plant a deadline directly on the armored section.
Drop off and take cover while it detonates.
That explosion cracks the armor and exposes the core underneath.
Get back on top and plant two more deadlines on the now-exposed core.

Landing two detonations in quick succession reportedly staggers the boss for several seconds, which makes the next climb up much easier, though treat this as a helpful bonus rather than something to plan a run around, since it is not consistently reported across every account of the technique.
Repeat the armor-then-core cycle until the boss is dead.
Bring more deadlines than you think you need, along with a mobility tool, meds, and something to deal with any smaller ARC that swarm in while you work.
Craft what you can ahead of time using our crafting guide, since running out of deadlines mid-fight ends the attempt.
If you would rather farm a Queen or Matriarch for loot on a repeatable route instead of a one-time trial score, our Matriarch farming guide covers that separately.
One-Shotting a Bastion or Bombardier
Bastions and Bombardiers are large, slow-moving targets that die to a single well-placed deadline if you can get on top of them safely, which makes them a fast way to rack up damage points without hunting a full boss spawn.
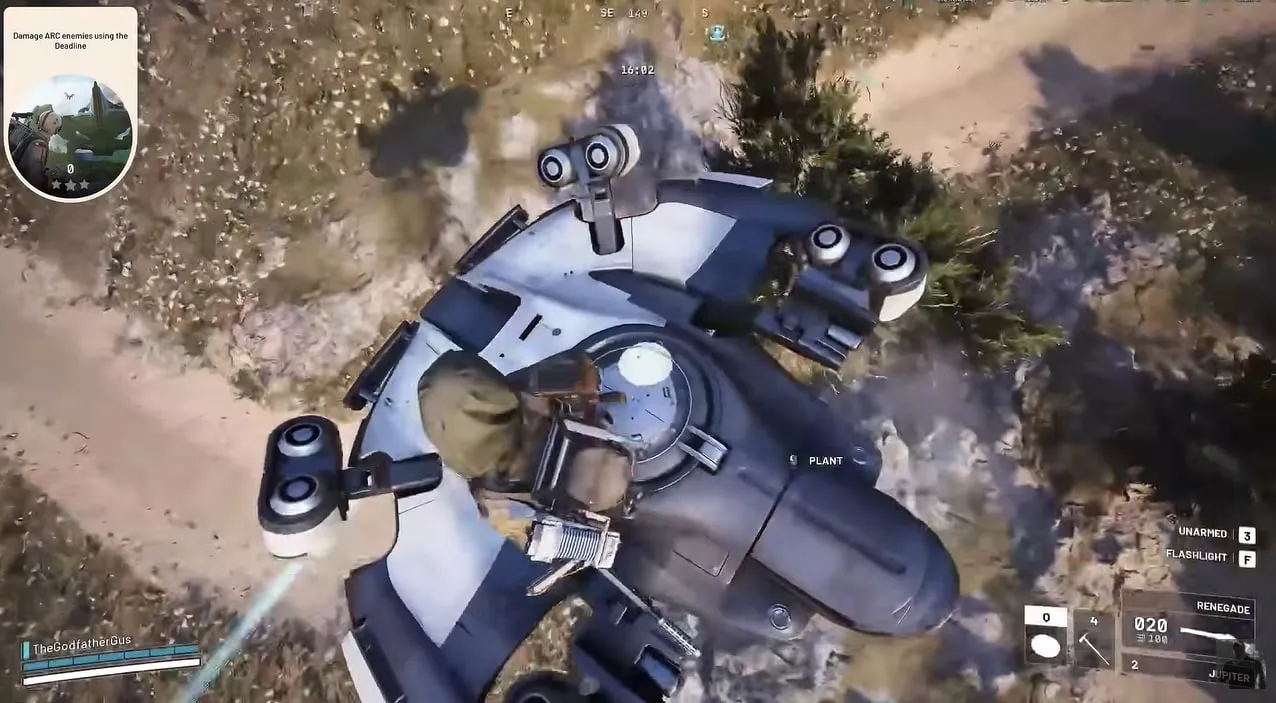
Clear any smaller ARC near the target first so you are not fighting two things at once.
Throw a lure grenade so it lands on the far side of the target, ideally behind cover.
That draws its attention and its fire away from you.
While it is distracted, close the distance and get up onto its back, since the rear canister is the exposed weak point rather than the heavily armored front.
A Photoelectric Cloak works as an alternative to the lure grenade if you have one crafted, letting you walk right up instead of baiting its attention first.
Plant a deadline and hold the interact prompt until it is fully placed.
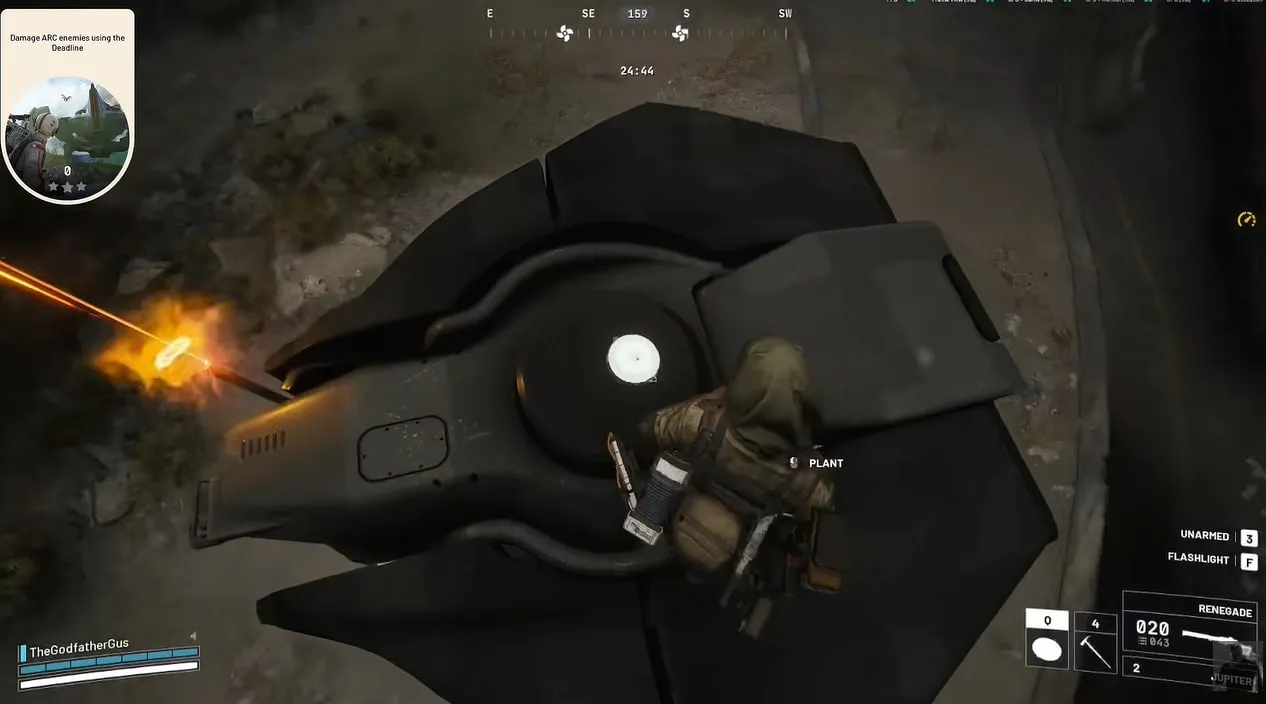
Throw a second lure grenade in any direction, then get clear.
A cloak or a quick grapple to nearby cover both work.
Deadlines carry a wide blast radius, so put real distance between yourself and the target before it detonates.
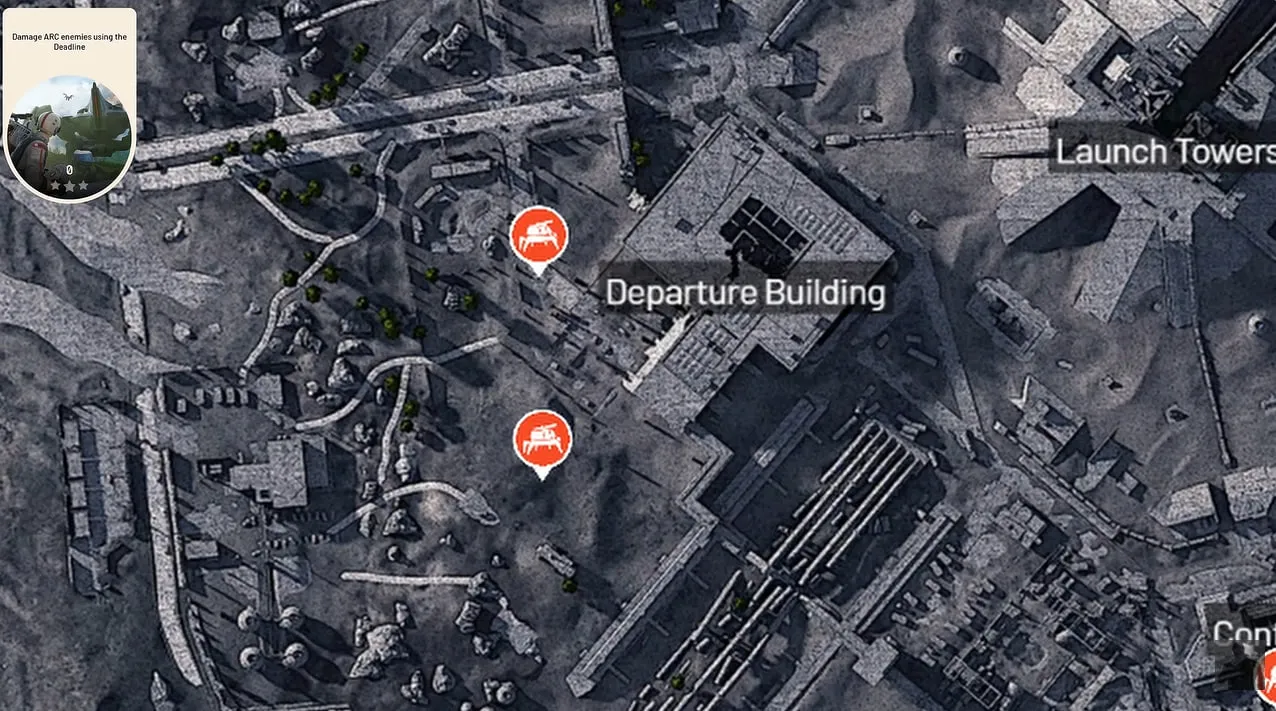
This works reliably on Bastions and Bombardiers with a consistent spawn point on a given map, since you can scout the location ahead of time and know exactly what you are walking into.
It is a genuinely risky maneuver the first few times you try it, so practice near an extract if you can, and bring more than one deadline in case your first attempt goes sideways.
Damage ARC With the Hullcracker
The Hullcracker’s launcher-style ammo makes it a strong single tool for stacking damage points quickly against a wide spread of enemies rather than one boss.
Large ARC pays off far more than small ARC does. Bastions, Bombardiers, Leapers, and Rocketeers are all worth chasing down over smaller targets like Ticks, Pops, or Comets, since one big kill can equal several small ones combined.
Shoot flying ARC out of the sky the moment they take off, since a Rocketeer that escapes is lost damage.

Snitches are worth engaging fully rather than avoiding.
A Snitch can call in additional ARC backup when it spots you, and killing everything it summons plus the Snitch itself, per Embark’s own update notes, adds up to solid damage in one spot.
Let a Snitch finish calling in its backup before you start shooting, so you get the full wave rather than cutting it off early.
Loot fallen ARC for extra ammo if you are running low mid-raid, but do not let looting slow down your pace.
Skipping loot entirely and moving straight to the next target usually nets more damage than stopping to scavenge, and pairing this trial with a proper loadout built around ammo economy makes the difference even bigger.
General Tips for Maximizing Trial Points
Skip the loot on pure damage trials.
Chasing dropped parts costs you time you could spend on the next kill, and that tradeoff rarely favors your score.
Avoid the single most obvious map or boss location for a given week’s objective if you are not confident you will get there first.
A crowded spawn usually means someone else already engaged the target before you arrive, and partial damage or a contested kill will not give you a full run.
Extraction timing matters more than it seems.
If your extract point sits inside the objective area, waiting until the last safe window to hit the button can buy you extra seconds of scoring time.
Just do not cut it so close that you risk failing to extract at all: a failed extract wipes the whole run.
Review our extraction guide if you are still getting a feel for safe extract windows.
Duo and trio teams have a real advantage on trials that reward covering ground or splitting a big fight, like probe searches or Hullcracker damage runs, since each teammate can work a different part of the map at once.
Solo runners are on more even footing for single-boss objectives like a Queen or Matriarch kill, since there is only one target to go around regardless of squad size.
Trials also tend to reward familiarity with a map’s enemy spawns, so time spent learning where big ARC typically land pays off across multiple trial weeks, not just the current one.
If you unlocked Trials recently, our leveling guide covers the fastest way to reach the level where they open up.
Key Takeaways
- The tap method lets you lock down every probe on a map early, then sweep all three panels on each in the match’s final minutes
- Quick-killing a Queen or Matriarch means armor first, then two deadlines on the exposed core, repeated until the boss goes down
- A single well-placed deadline can one-shot a Bastion or Bombardier if you distract it with a lure grenade first
- Major Map Conditions no longer double trial points, so do not build a run around chasing one for that reason alone
- Skipping loot and prioritizing big targets first squeezes more score out of every trial run
FAQ
How does trials scoring actually work?
You earn points for a specific objective during a single raid, and that score only banks if you extract successfully. Only your personal best run per trial counts toward your rank, so a bad attempt does not drag down a good one. Your overall rank each week comes from your combined personal bests across that week’s full set of trials.
Do trial points carry over between raids?
No. Points do not stack from one extraction to the next. Each raid is scored on its own, and only your highest result per trial is kept.
What happens if I die before I extract?
Dying, disconnecting, or otherwise failing to extract wipes that run’s trial progress entirely, even if you racked up a big score before going down. Always weigh whether pushing for a few extra points is worth the risk of losing the whole run.
What is the tap method for prospecting probes?
It is a technique where you interact with a probe’s panel just long enough to start the breach, which stops the probe from flying away without fully searching it on the spot. You tap every probe you find early in the match, then use the final stretch to circle back and fully search all three panels on each one.
How do I quick-kill a Queen or Matriarch with deadlines?
Get on top of the boss and plant a deadline on the armored section, then retreat while it detonates. That exposes the core underneath, where two more deadlines on it will often stagger the boss briefly, giving you an easier window to finish it off with another cycle or two.
Can I really one-shot a Bastion with a single deadline?
Yes, if you plant it directly on the target and get enough distance before it detonates. A lure grenade thrown behind cover first helps pull its attention away so you can close in and plant the charge safely.
What is the best target priority for a Hullcracker damage trial?
Large ARC like Bastions, Bombardiers, Leapers, and Rocketeers are worth far more than small ARC like Ticks, Pops, or Comets, so chase those down first. Shoot flying ARC down the moment they take off rather than letting them escape into the air.
Do Major Map Conditions still double trial points?
Not anymore. That bonus was removed as part of the Riven Tides trials overhaul, so a Night Raid or EM Storm condition no longer multiplies your score the way it did in earlier seasons.
Should I run trials solo or with a team?
Both work, but teams have a clear edge on objectives that reward covering more ground, like probe searches or general damage trials, since squadmates can split the map. Solo runners are on more even footing for single-boss trials, since there is only one Queen or Matriarch on the map regardless of squad size.
When does the current Trials season end?
Trials Season 5 is scheduled to close on September 22. A new set of objectives typically follows shortly after, so expect the specific trials referenced here to rotate even if the underlying techniques stay useful.
Do trial objectives repeat from season to season?
Yes. Objective types like damaging ARC with deadlines, searching probes, or damaging a Queen or Matriarch have all returned across multiple trials seasons, just with different point values and map recommendations each time.