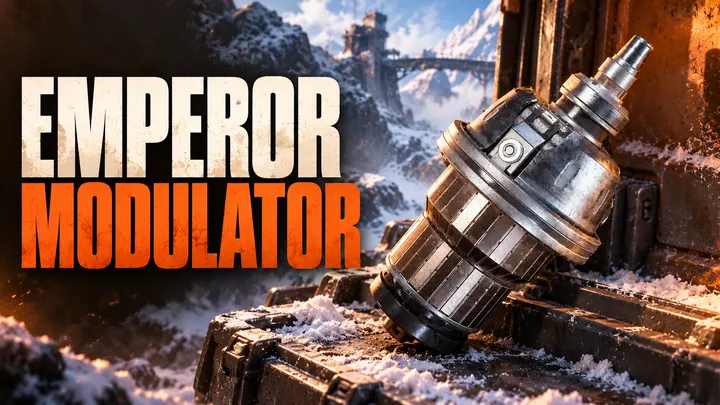
The ARC Raiders Emperor Modulator is the one item standing between you and Gunsmith Level 4, and it only drops inside the fallen Emperor on Pendola Pass.
Getting in takes a crafted key, a lucky Redirection window, and a dungeon that punishes sloppy runs. Losing the Modulator on the way out hurts even more. Here is the full route, from first beacon to safe extraction.
Table of Contents
- What Is the Emperor Modulator?
- How to Get the Emperor Modulator at a Glance
- Step 1: Farm Redirection on Pendola Pass
- Step 2: Craft the Emperor Gateway Conduit
- Step 3: Unlock the Emperor Door
- Step 4: Clear the Emperor and Find the Modulator
- Best Loadout for an Emperor Run
- What Updates 2.1.0 and 2.2.0 Changed
- Protect the Modulator and Extract
- Gunsmith Level 4: What the Modulator Unlocks
- Should You Farm More Than One?
- Common Mistakes to Avoid
- Key Takeaways
- FAQ
What Is the Emperor Modulator?
The Emperor Modulator is a Legendary Topside Material added with the Frozen Trail update.
According to the ARC Raiders Wiki, it stacks to 1, weighs 0.5, sells for 7,000 Coins, and cannot be recycled or salvaged. The wiki lists the Fallen Emperor as its only source.
Its one job is the Gunsmith Level 4 upgrade. For the full room-by-room walkthrough of the dungeon, see our Emperor guide.
You only need one, so do not sell your first.
How to Get the Emperor Modulator at a Glance
- Queue into Pendola Pass while the Redirection map condition is active.
- Loot a Harvester payload for the Conduit blueprint and the three ARC couplers.
- Craft the Emperor Gateway Conduit at Workbench 1.
- Use the Conduit on the Emperor door at the base of the machine.
- Search every special pod on the way through and in the final room.
- Put the Modulator in a safe pocket and extract.
The drops are random at several points in that chain, so expect more than one raid.
If you want to read a shorter version, check out Medium Article.
Step 1: Farm Redirection on Pendola Pass
Redirection is a map condition exclusive to Pendola Pass. Our Pendola Pass map guide covers the rest of the map, and the Flash Freeze survival guide helps if the weather turns on you.
The farming loop works like this:
- Find an active Damaged Emperor Relay. It is marked on your map and shows a tall red beam.
- Interact with it to collect an Emperor Beacon.
- Deploy the beacon in an open area with clear sky.
- Move away fast. A debris storm hits the drop zone for roughly 15 to 20 seconds, according to community testing.
- Breach the Harvester payload that lands and search it.
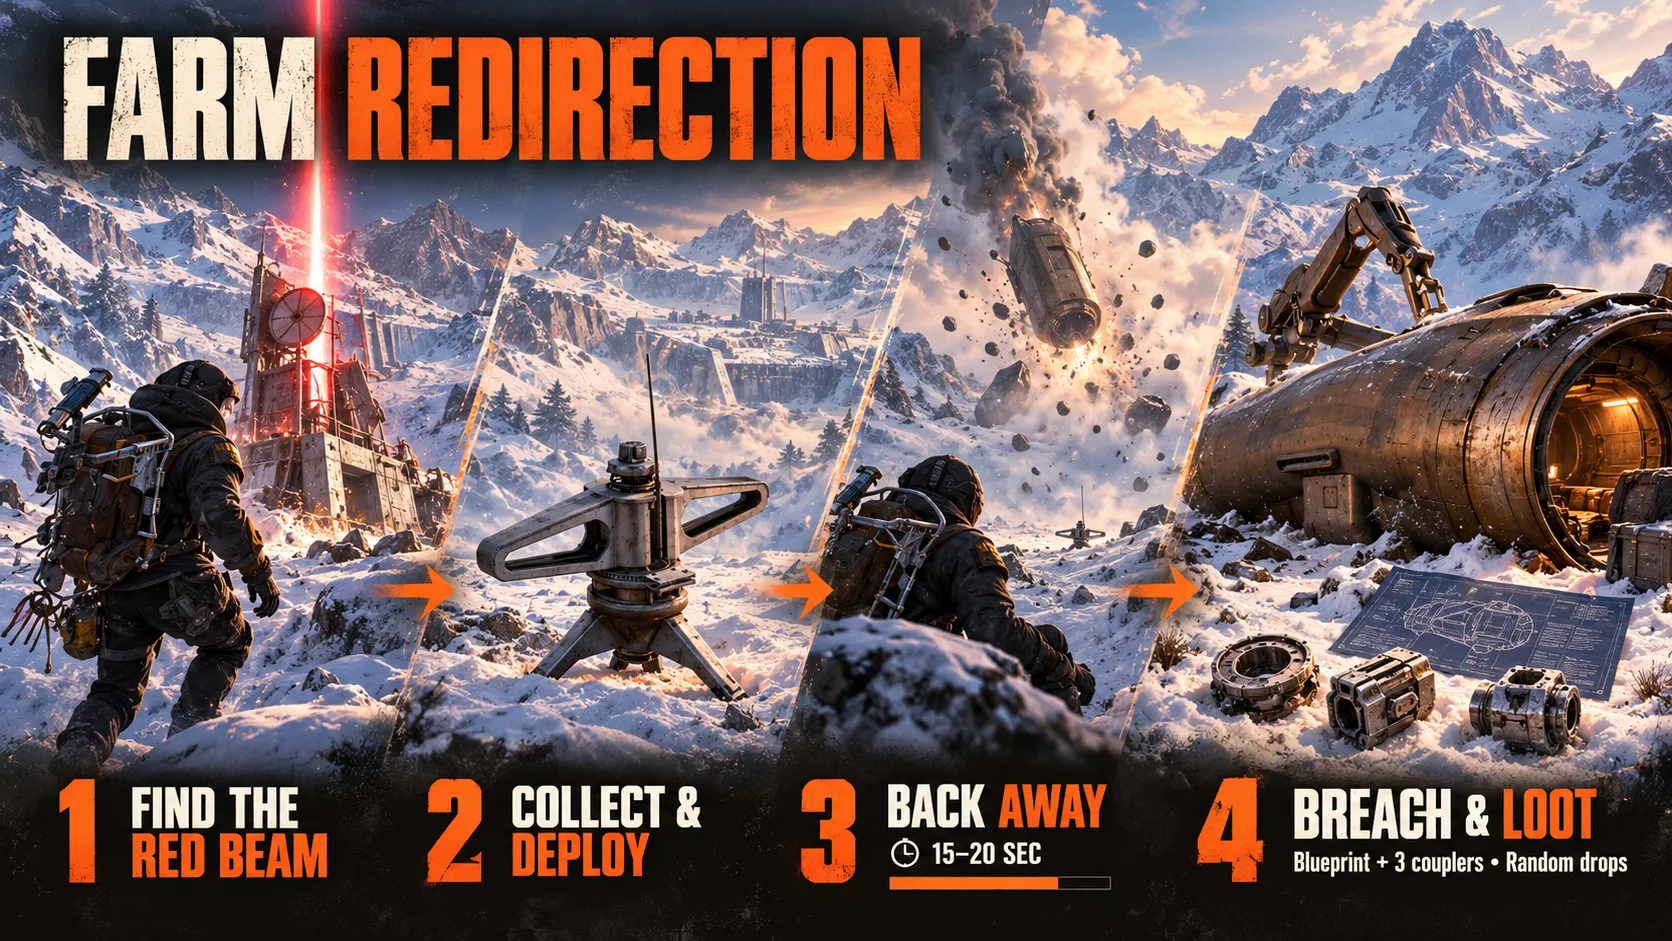
The payload can hold the Emperor Gateway Conduit Blueprint and all three couplers. All of it is random, so you may need several payloads. Community reports describe the blueprint as the scarce piece.
Two details worth planning around:
- An Emperor Beacon reportedly cannot be kept between raids. Use it in the same run you pick it up.
- Community trackers report Redirection running several times a day in roughly one-hour windows, but Embark has not published a schedule. Check the map conditions before you queue.
There is also a second route to the key. The wiki page for the Conduit lists the Frozen Trail Premium Reward Pass as a source, as its last reward. Our Reward Pass breakdown covers what Premium costs.
The PvE matchmaking toggle test, which did not offer Redirection, ended on October 20. Embark expects to share more in November. For now, queue normally to farm the Conduit parts. Our PvE toggle test guide covers how the test worked.
Step 2: Craft the Emperor Gateway Conduit
Learn the blueprint first. Blueprints only unlock after you extract with them, so the payload loot has to survive the trip home.
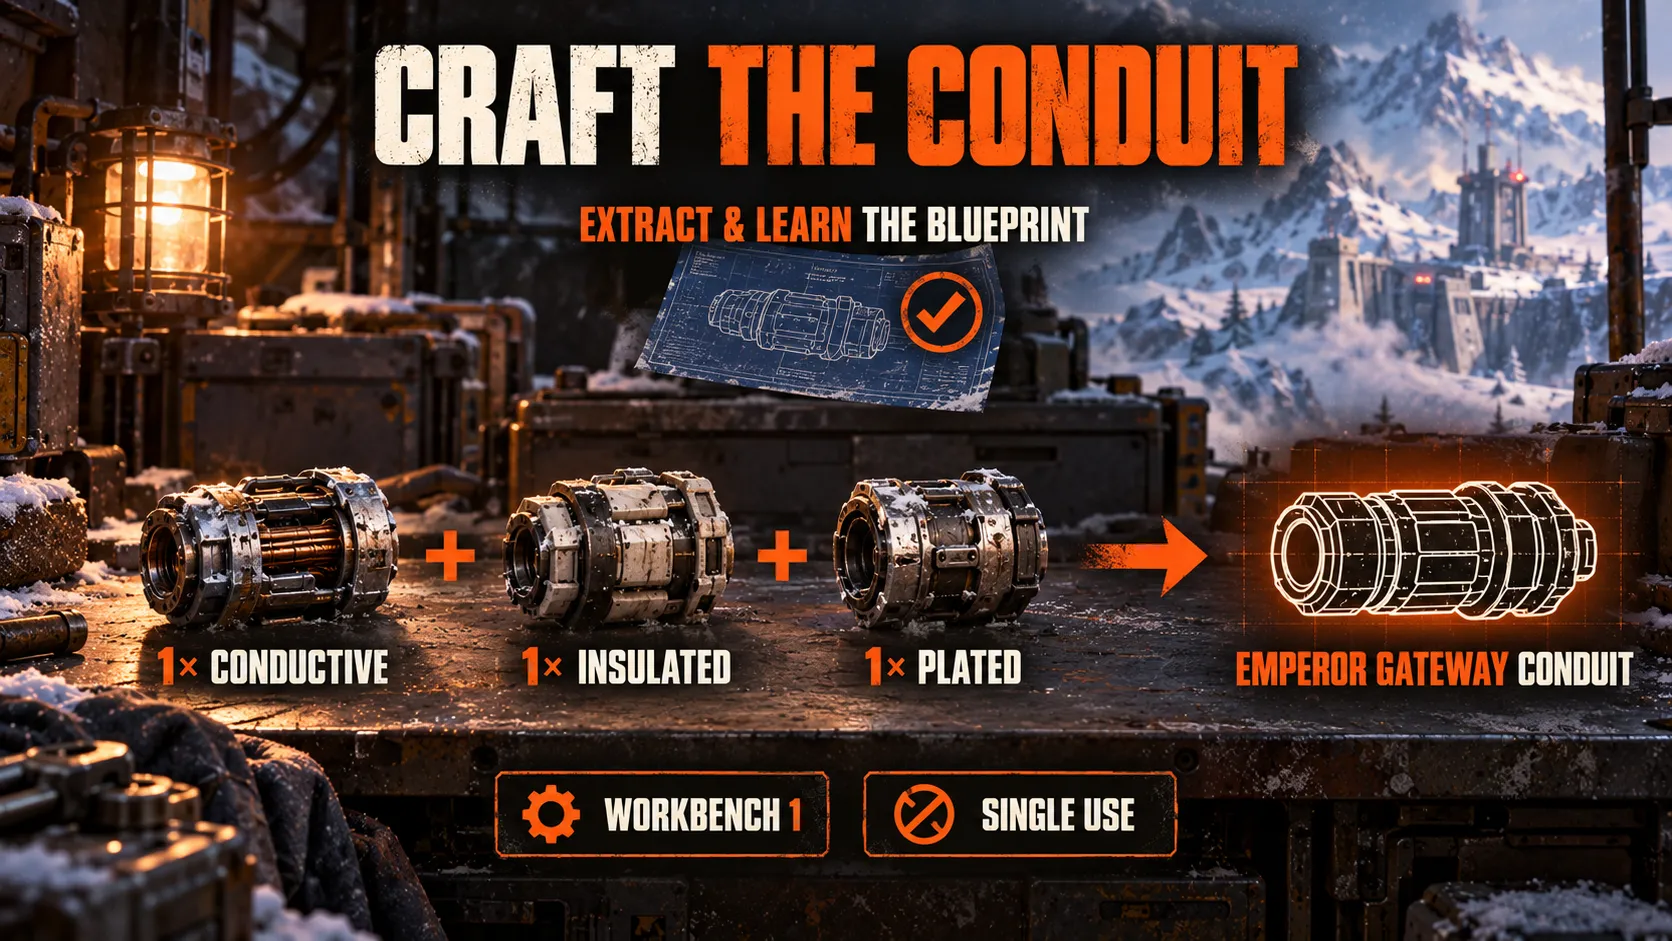
Then craft the Conduit at Workbench 1.
| Ingredient | Quantity |
|---|---|
| ARC Conductive Coupler | 1 |
| ARC Insulated Coupler | 1 |
| ARC Plated Coupler | 1 |
The Emperor Gateway Conduit is a Legendary key that weighs 0.5 and sells for 1,000 Coins, per the wiki. It is a single-use key, so craft it only when you are ready to run the Emperor.
Step 3: Unlock the Emperor Door
The door sits at the base of the Fallen Emperor on the west side of Pendola Pass, near Piazza della Rupe.
Our Emperor guide shows the exact entrance. Walk up with the Conduit in your inventory and use the prompt. Players report that the key is consumed and that opening the door is loud enough to draw nearby squads, so clear the area first.

Step 4: Clear the Emperor and Find the Modulator
The opening section is the same on every run: a corridor with electric traps, a Hydra turret, and an electrified elevator. Shoot the yellow nodes to cut the power, then ride up.
After the elevator, the Emperor shuffles its encounters. Players have documented rooms like these (our Emperor guide walks through each one in detail):
- Pillar room: shoot the yellow nodes to lower a pillar, then ride it up.
- Crusher room: closing walls and stamina-draining gas. Time your runs between the walls.
- Laser tunnel: crouch behind the central drum to block the beams.
- Container room: hook to the top and ride a lowering container.
- Hydra room: reported as a fixed encounter in every layout. Kill the first Hydra that activates before the others lock on, and remember that Update 2.2.0 changed how Hydras pick targets. Our Hydra guide covers where to aim.
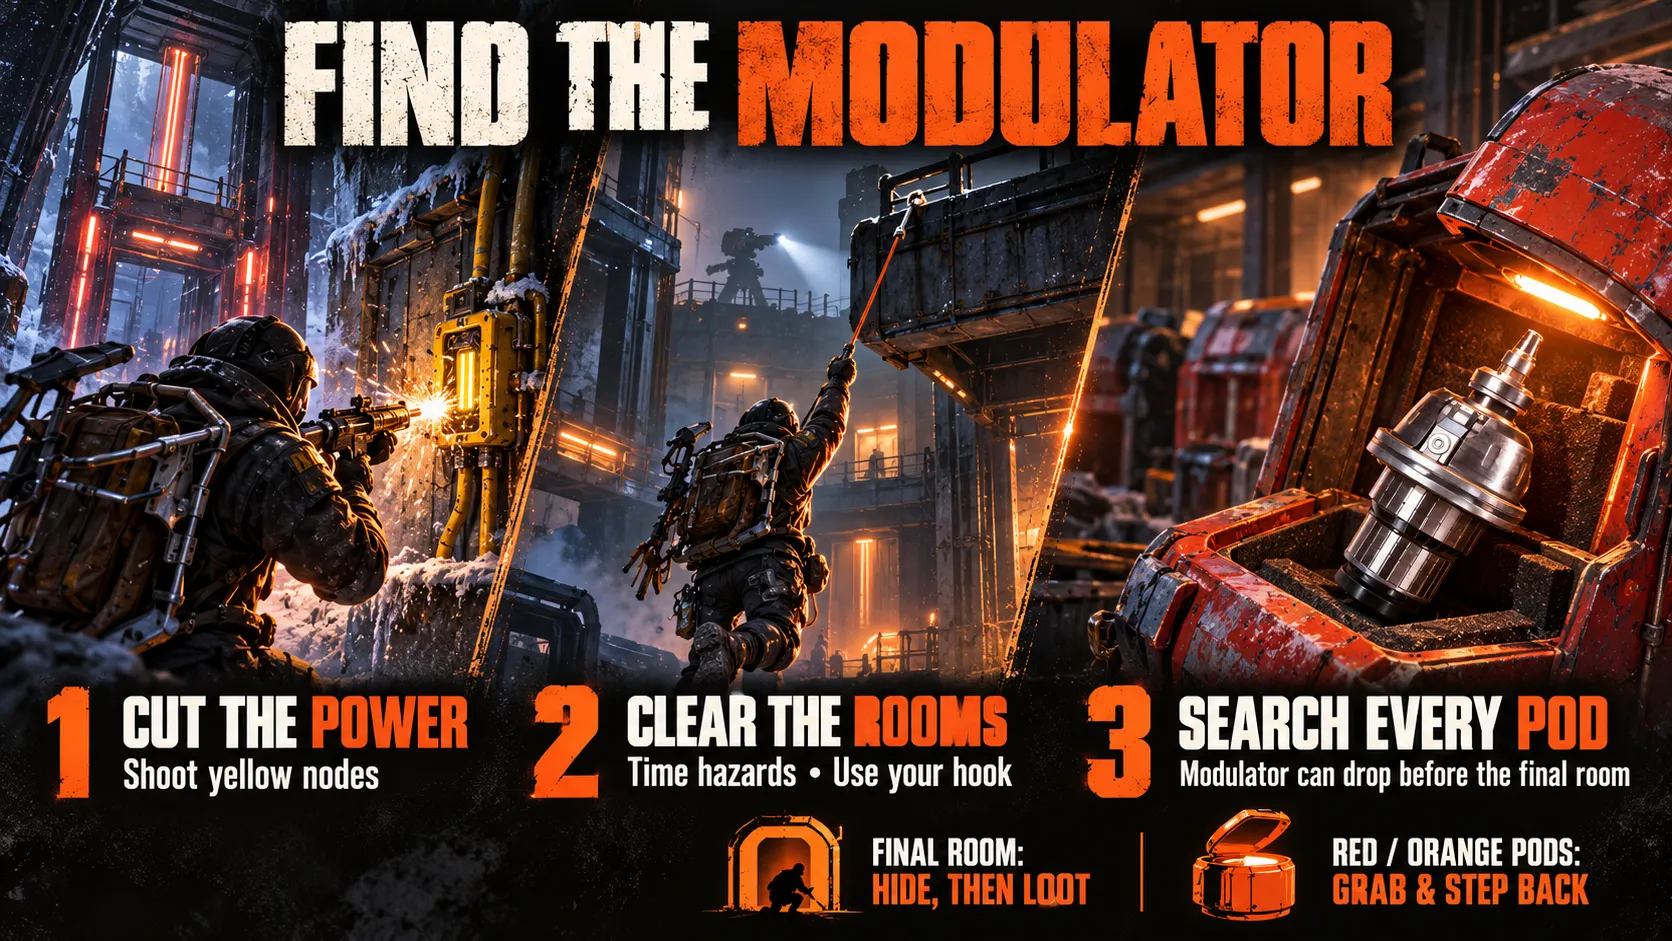
Special pods are where the Modulator lives. Red and orange pods carry a short fuse once you breach them, so grab what you want and step back.
Do not rush to the end. Sources agree the Modulator can appear in pods earlier in the dungeon, not only in the final room.
In the final room, dropping to the floor opens the big door and a wave of ARC enemies appears. Hiding often works better than fighting. Once it is quiet, loot the racks and shoot the yellow nodes on both walls to release more payloads. One or two of those payloads can hold a Modulator.
Best Loadout for an Emperor Run
Pack for ARC machines and climbing, not for player fights.
| Item | Why bring it |
|---|---|
| Snap Hook | Vertical sections and platforming. Embark cut its range from 20m to 18m in the 2.0 notes, so judge gaps carefully. |
| Grappling Hook | A backup climbing tool if your Snap Hook breaks. See our Grappling Hook guide. |
| Hullcracker | Explosive rounds for Hydra turrets. Embark’s rework gives explosives over 50% more damage against armor plates and about 30% less against fragile parts. |
| Anvil or Renegade | Breaking the yellow nodes inside the puzzle rooms. |
| Looting augment | Extra space for loot. Looting Mk. 3 (Survivor) reportedly adds three safe pocket slots. |
| Healing and Shield Rechargers | The hazards chip away at you all run. |
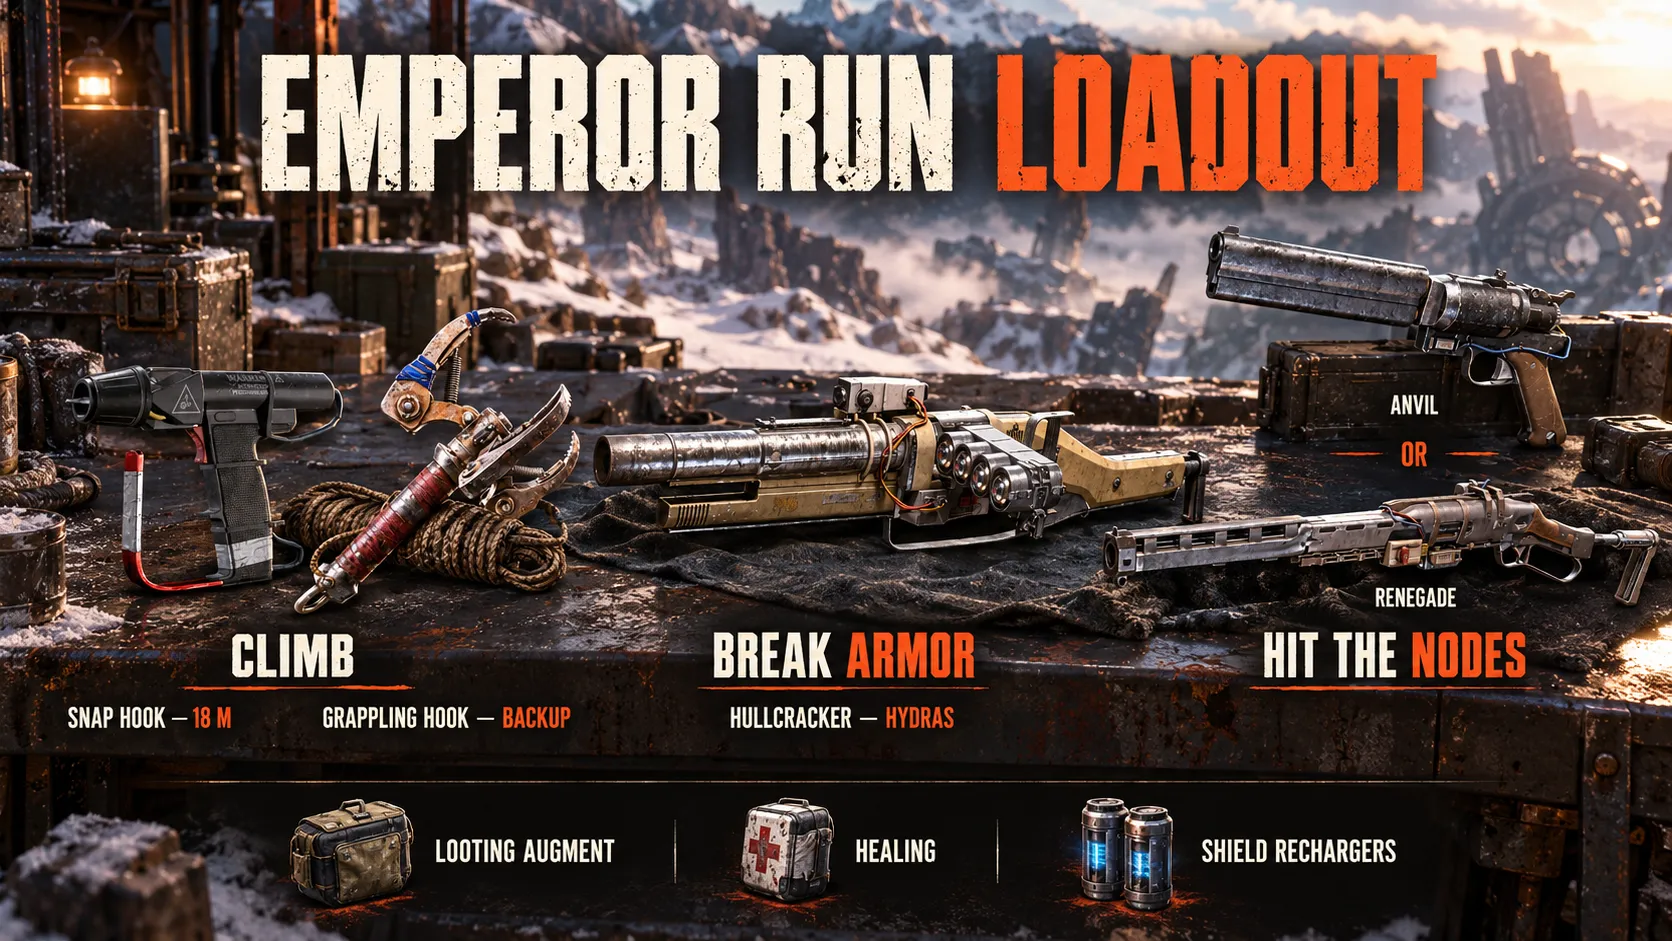
The 2.0 patch notes also moved the Hullcracker and Anvil out of Tian Wen’s stock and into the weekly Nomadic Envoys rotation. If you do not own one, plan ahead.
What Updates 2.1.0 and 2.2.0 Changed
Embark’s Store Update 2.1.0 notes from October 13 list one Emperor change: unintended interactions between throwables and certain doors on the Emperor were fixed.
In practice, the door shortcut that let squads skip the maze is closed. Community reports before the patch also described teams camping the loot room, so enter ready for company, especially on a cleared route.
Plan for the full run. Older guides that lean on the shortcut are out of date.
Embark’s Store Update 2.2.0 notes from October 20 made several changes that touch this run:
- Hydras: targeting now spreads more often, with base damage raised to compensate, and close-range hits land more reliably.
- Emperor platforms: moving platforms no longer fall out of sync, and a collision issue that could trap players inside the Emperor was fixed.
- Pendola Pass: enemy presence increased slightly, so expect a bit more traffic around the machine.
- Weapon Bench: the amplified weapon button now reads “Amplify” instead of “Ascend”.
Protect the Modulator and Extract
The moment a Modulator drops, move it into a safe pocket. A safe pocket keeps the item even if you are downed.
You have two ways out:
- The way you came: the big hatch that opens in the final room, or the side doors if you destroyed the wall nodes.
- The Reckless Transceiver: the Ballistic Gondola extraction in the Emperor’s shadow. It is the closest exit and also the most exposed.
Embark’s 2.1.0 notes extended compass and map visibility for Gondola markers from 120 to 175 meters, which makes the transceiver easier to find. Update 2.2.0 also made ARC react when a Gondola Transceiver is interacted with, so do not count on a quiet call. Embark lists a known issue where players who board while downed and near knockout can still die. Our extraction methods guide covers timing trade-offs.
Gunsmith Level 4: What the Modulator Unlocks
Per the wiki’s Workshop page, the Gunsmith Level 4 upgrade costs:
| Material | Quantity |
|---|---|
| Emperor Modulator | 1 |
| Radial Press | 3 |
| Magnetic Accelerator | 3 |
It also requires the Outpost. Magnetic Accelerators are crafted at Refiner Level 3, so check your bench levels in our workbench upgrade guide.
Most guides stop at the Modulator. The Outpost chain is where players get stuck:
- Unlock the Outpost through its project. Our Sheltered Retreat project guide covers all three stages.
- Raise the Outpost to Level 4. Community guides report the Level 3 to 4 step costs 40 Sheet Metal, 3 Laser Levels, and 3 Insulation Rolls.
- Upgrade the Gunsmith with the Modulator, Radial Presses, and Magnetic Accelerators.
Once Gunsmith IV is done, the Weapon Amplification menu opens. Only fully upgraded weapons can be amplified. Amplification Modules drop from the Frigate and inside the Emperor. Our Frigate guide and amplified weapons guide cover the next steps.
Should You Farm More Than One?
No. The Gunsmith upgrade takes a single Modulator, and nothing else on the wiki lists a use for extras.
Get one, stash it, and finish the upgrade. After that, Emperor runs are worth it for the Amplification Modules and other high-value ARC loot inside.
Common Mistakes to Avoid
- Selling the first Modulator. 7,000 Coins is tempting, but you need it.
- Skipping the safe pocket. One wipe in the final room can cost you the whole run.
- Rushing to the end. Special pods earlier in the dungeon can hold the Modulator too.
- Entering without a climbing tool. The vertical sections are slow without a hook.
- Using old Hydra advice. Update 2.2.0 changed how Hydras target players.
- Planning around the old shortcut. Update 2.1.0 closed it.
- Forgetting the Outpost. Gunsmith IV needs it, so start that chain early.
Key Takeaways
- The Emperor Modulator drops only inside the Fallen Emperor on Pendola Pass.
- You need an Emperor Gateway Conduit: blueprint plus one of each ARC coupler, crafted at Workbench 1.
- Redirection is the farm for the blueprint and couplers, and the PvE toggle test is over.
- Search every special pod, not only the final room.
- Stash the Modulator in a safe pocket immediately.
- Gunsmith Level 4 needs one Modulator, 3 Radial Press, 3 Magnetic Accelerator, and the Outpost.
- Update 2.1.0 closed the door shortcut, and 2.2.0 retuned Hydras and the Emperor.
FAQ
What is the Emperor Modulator used for in ARC Raiders?
The Emperor Modulator is a Legendary material used for one thing: upgrading the Gunsmith from Level 3 to Level 4. That upgrade unlocks Weapon Amplification. You need exactly one for the upgrade, so keep the first one you find.
Where does the Emperor Modulator drop?
It drops inside the fallen Emperor on Pendola Pass, which the ARC Raiders Wiki lists as its only source. Search the special pods along the route and the loot racks in the final room. It is a random drop, so a full run does not guarantee one.
How do I get into the Fallen Emperor?
You need an Emperor Gateway Conduit to open the door at the base of the machine. Craft it at Workbench 1 from the blueprint plus one ARC Conductive, one ARC Insulated, and one ARC Plated Coupler. The blueprint and couplers come from Harvester payloads during the Redirection map condition.
How many Emperor Modulators do I need?
One. The Gunsmith Level 4 upgrade asks for a single Emperor Modulator. Extra copies have no other listed use, so farm Amplification Modules instead once you have yours.
Is the Emperor Modulator guaranteed every run?
No. It is a random loot drop, and players report finding it in different pods from run to run. Check every special container instead of rushing to the final room.
What do I need to craft the Emperor Gateway Conduit?
You need the learned Emperor Gateway Conduit Blueprint, one ARC Conductive Coupler, one ARC Insulated Coupler, and one ARC Plated Coupler. Craft it at Workbench 1. The conduit can also come from the last reward of the Frozen Trail Premium Reward Pass.
Does the PvE toggle affect Redirection farming?
Not anymore. The PvE matchmaking toggle test, which did not offer Redirection, ended on October 20. Queue normally to farm couplers and the blueprint.
Can I still skip the Emperor puzzles?
Do not plan on it. Update 2.1.0 fixed unintended interactions between throwables and certain doors on the Emperor, which closed the shortcut players were using. Plan for the full run.
Where is the Fallen Emperor located?
The Fallen Emperor sits on the west side of Pendola Pass, near Piazza della Rupe. The door you unlock with the conduit is at the base of its body. The Reckless Transceiver extraction sits in its shadow.
Can I sell or recycle the Emperor Modulator?
You can sell it for 7,000 Coins, but you should not. The wiki says it cannot be recycled or salvaged, and you need it for the Gunsmith Level 4 upgrade. Sell only a spare after your upgrade is done.
What do I need for Gunsmith Level 4 besides the Modulator?
The upgrade needs 3 Radial Press and 3 Magnetic Accelerator alongside the Modulator, and your Outpost has to be unlocked. Community guides also report that the Outpost needs to be Level 4 first. Magnetic Accelerators are crafted at Refiner Level 3.