We ran the same Spaceport loop three different ways, and it paid out every single time.
Three night runs combined for 400,000 credits. A free-loadout daytime run still pulled 86,000 credits. A Security Breach run alone hit 150,000 credits with four epic-tier drops.
None of it required fighting for the Launch Towers, which is where most Spaceport runs end up stuck.
Here’s the full route, every result, and why we think the red lockers on this path are more underrated than the security spawns everyone rushes for.
For how Spaceport compares to the rest of the map roster, see our Arc Raiders loot map guide.
Table of Contents
- The Route: Departure Building, Arrival Building, Shipping Warehouse
- Why Red Lockers Are the Real MVP Here
- What to Bring: The Loadout We’d Recommend
- Putting the Route to the Test: Three Runs, Three Conditions
- Common Mistakes on This Route
- Extraction Safety: Why Two Nearby Extracts Matter
- Quick Reference: Day vs. Night and Beginner Friendliness
The Route: Departure Building, Arrival Building, Shipping Warehouse {#the-route}
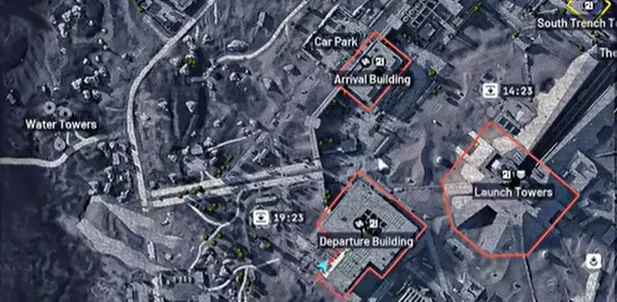
The Launch Towers have some of the best loot density on Spaceport, and every raider on the map already knows it.
That’s exactly why we skip them on this route. The tower area has become a highly contested PvP zone, and building a run around it means fighting for the loot before you’ve even opened a locker.
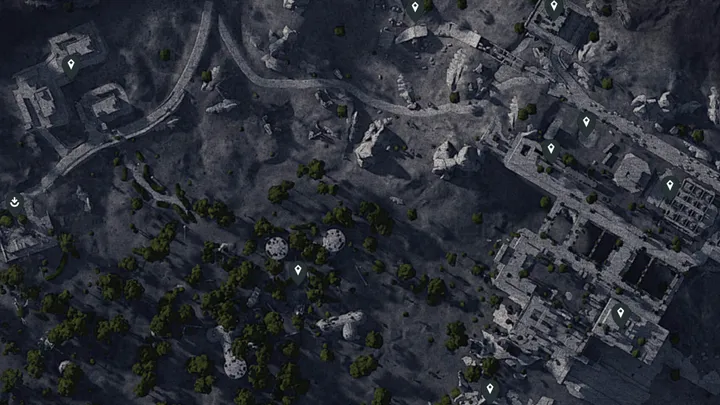
Instead, we stay on a loop between the Departure Building, the Arrival Building, and the Shipping Warehouse connecting them. The appeal isn’t any single room, it’s the density of lockers packed into a compact area, with two extraction points nearby so you’re never far from a way out.
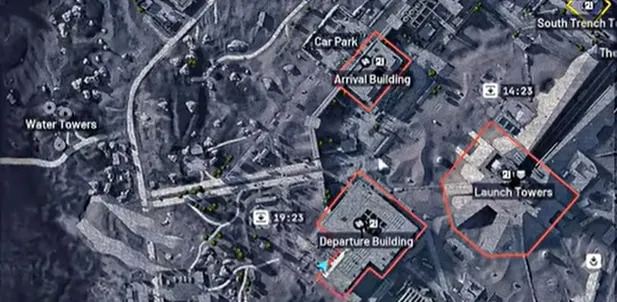
Inside the buildings, our priority is simple: hit every locker room we pass, including the ones that look already picked over.
Several of our best pulls came from lockers that looked untouched on approach but hadn’t actually been opened yet.
A few habits made a real difference for us:
- Keep your flashlight off while looting to avoid getting spotted from behind
- Treat every locker room as worth checking, even ones off the direct path
- Don’t fight for loot that isn’t yours if another Raider is already in the room, since the route has more than enough elsewhere
Why Red Lockers Are the Real MVP Here {#red-lockers}
Security lockers get most of the attention on Spaceport because they’re the ones tied to the Security Breach skill, and normally they need a key to open (our keys guide covers where those actually drop).
Red lockers get skipped far more often, and on this route that’s a mistake.
Across our tested loops, red lockers produced mixtapes, an anvil blueprint, gun parts, jewelry, and multiple weapon cases, on top of everything we pulled from the security spawns.
On one run alone, two mixtapes came out of red lockers back to back.
We treat red lockers as a core stop on this route, not a side pickup, and it’s one of the bigger reasons our credit totals held up across every test.
What to Bring: The Loadout We’d Recommend {#what-to-bring}
Our free-loadout test above proves this route doesn’t require a perfect kit. But if you’re not deliberately stress-testing the low end, a custom loadout beats a free one for this specific route.
A free loadout locks you into 14 inventory slots, 2 weapon slots, Light Shield only, and no safe pocket at all.
A custom loadout with a Looting augment opens that up considerably: up to 24 backpack slots and, depending on the augment tier, 1 to 3 safe pocket slots, with weight limits ranging from 40 to 80.
The Epic version of the Looting augment gives you three safe pockets, which is enough to guarantee an epic drop, a blueprint, and a mixtape all extract with you even if the run goes wrong.
Beyond the augment itself, keep the rest of the kit simple:
- Enough bandages and at least one shield recharger, since this route puts you through several close-quarters rooms
- Two full slots of ammo for your primary weapon
- One grenade or escape tool (smoke, a door blocker, anything that buys you a few seconds) for when a room gets contested
You don’t need a maxed-out kit to run this route well. You just need enough healing and ammo that a short fight doesn’t end your run early.
Putting the Route to the Test: Three Runs, Three Conditions {#three-tests}
We didn’t just run this once and call it good. Here’s what happened across three separate tests.
| Run | Time of Day | Loadout | Result |
|---|---|---|---|
| Runs 1-3 (combined) | Night | Standard | 400,000 credits total |
| Free loadout test | Day | Free loadout, no safe pockets | 86,000 credits |
| Security Breach run | Night | Security Breach skill | 150,000 credits |
Three Night Runs, 400,000 Credits Combined
We ran this route three separate times at night, for a combined total of 400,000 credits.
Only one real piece of conflict happened across all three runs, which for a Spaceport route is an unusually clean ratio.
We chose night mode specifically for the increased chance at rare-tier loot. The tradeoff is losing radar hatch visibility, which not every player wants to deal with, but our results support the tradeoff being worth it if you’re focused on maximizing credits per run.
The Free Loadout Test: 86,000 Credits With Nothing to Lose
We also tested the same route during the day with a free loadout: a limited backpack and no safe pockets.
The very first locker we opened on that run produced an epic-rarity trinket, and we extracted with 86,000 credits total.
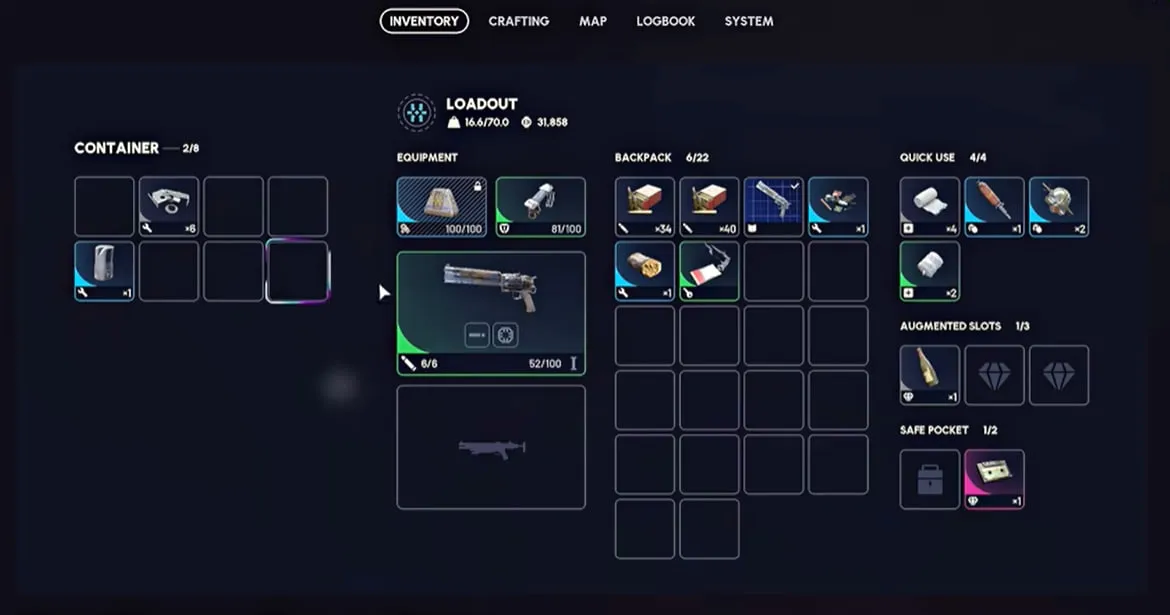
That result matters more than it looks at first. It means the route’s value comes from the locations themselves, not from bringing in an expensive kit that inflates the credit total through gear you already owned.
If you’re a newer or low-resource player, this exact loop should still give you a real result, not just a geared player’s best case.
The Security Breach Run: 150,000 Credits and Four Epic Drops
Our most detailed test used the Security Breach skill, which lets you force open security lockers without needing a key.
That run alone produced four epic-tier guns, an epic blueprint, an epic attachment blueprint, two mixtapes, gun parts, and an extra anvil blueprint (currently one of the strongest PvP picks in the game per our PvP weapons tier list), and we extracted with 150,000 credits.
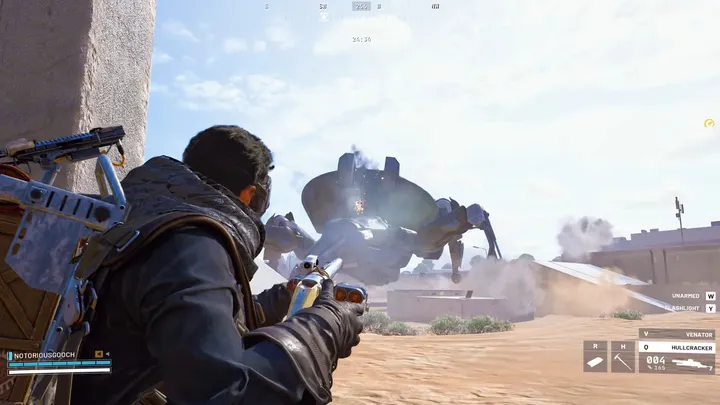
The run wasn’t without close calls. A leaper and a rocket-class ARC both showed up near the end of the loop, and our final extraction came down to a tense last stretch near the exit.
Even with that, the route held up as one of our stronger results across all three tests, and it’s a clear example of what the loop is capable of when Security Breach is available.
Without the skill, the route is still solid, as our free-loadout run shows. Security Breach just pushes the ceiling higher by opening up more of the security locker rooms along the path. Those extra blueprint drops are also worth chasing beyond raw credits, since security containers are one of the most reliable sources for augment blueprints (our augments guide breaks down which ones are worth building).
Common Mistakes on This Route {#common-mistakes}
A few habits separate a clean run here from a wasted one.
Fighting over loot instead of letting it go. In our Security Breach run, another Raider walked in while we were mid-loot in a locker room. Standing your ground over a single locker’s contents when the rest of the building is still unlooted isn’t worth the risk - this route has more than enough loot elsewhere.
Skipping ammo and healing to save backpack space. It’s tempting to leave every slot open for loot, but running short on bandages or shield rechargers is one of the most common ways players lose runs they’d otherwise have walked away from clean, per Game Rant’s breakdown of frequent ARC Raiders mistakes. Keep two full slots of ammo per weapon and enough healing to survive a surprise fight.
Ignoring the ARC threat while focused on loot. Our night runs and our Security Breach run both ran into ARC threats mid-loop, including a leaper and a rocket-class unit. Every ARC type has its own armor rating, and assuming they all die the same way is a fast way to lose a full backpack late in a run, according to the same Game Rant piece.
Overstaying in a room after you’ve heard another Raider. If you hear breaching or footsteps nearby, that’s the signal to finish up and move, not to keep looting the same room hoping they leave first.
Extraction Safety: Why Two Nearby Extracts Matter {#extraction-safety}
This route sits near two extraction points instead of one, and that’s a big part of why it stayed low-risk across every test we ran.
If one extract becomes contested or another Raider is camping it, the second gives an immediate fallback without a long, exposed rotation across open ground.
That safety margin is what makes this route repeatable rather than a one-time lucky run. Spaceport punishes routes built around a single distant extraction point, since a camped extract at the end of a loot-heavy run can undo everything you gained along the way.
Quick Reference: Day vs. Night and Beginner Friendliness {#quick-reference}
Night runs on this route lean toward better odds at rare-tier gear, based on our results, while day runs trade some of that upside for full radar hatch visibility.
Both conditions produced strong results for us on this specific route, which isn’t true of every Spaceport loop.
Our free-loadout test also suggests this route works for newer players, not just geared ones.
A limited backpack and no safe pockets still returned 86,000 credits and an epic trinket, which is a solid outcome for players still building up their gear.
Key Takeaways
- Our Departure Building, Arrival Building, and Shipping Warehouse loop avoids the highly contested Launch Towers while still delivering strong loot
- Three night runs combined for 400,000 credits, with only one real PvP encounter across all three
- A free-loadout daytime test still extracted 86,000 credits, including an epic trinket from the first locker opened
- Red lockers consistently produced high-value items (mixtapes, blueprints, gun parts) and shouldn’t be skipped in favor of security spawns alone
- Our Security Breach run hit 150,000 credits with four epic-tier drops
- Two nearby extraction points give this route a safety margin most Spaceport loops don’t have
FAQ
What is the best loot route on Spaceport in Arc Raiders?
We run a loop through the Departure Building, Arrival Building, and Shipping Warehouse that consistently produces strong loot without forcing a fight at the Launch Towers. We tested it across three night runs for a combined 400,000 credits, plus a daytime free-loadout run and a Security Breach run, all documented below.
Why avoid the Launch Towers for loot in Arc Raiders?
The Launch Towers are widely known as the best loot on Spaceport, which means they’re also the most contested zone on the map. Newer players especially tend to run into repeated PvP fights there before they even finish looting. Our Departure and Arrival Building loop delivers comparable value with far less contest.
How much can you make on a single Spaceport loot run?
Across our three tested night runs on this route, total earnings reached 400,000 credits. Our separate Security Breach run alone brought in 150,000 credits with multiple epic-tier drops. Results vary run to run, but this route has held up as consistently profitable across different conditions for us.
Is this Spaceport route safe for solo players?
It’s built around two nearby extraction points, which keeps rotation options open if a fight breaks out. Across our tested runs, only one real PvP encounter occurred despite multiple full loops, which is a strong ratio for a Spaceport route.
Does night mode improve loot on Spaceport?
Our tests suggest night mode increases the odds of rare-tier drops, which lines up with the results: three night runs produced multiple epic items and blueprints. The tradeoff is reduced radar visibility, which some players find harder to play around than the loot bonus is worth.
Can you get good loot on Spaceport with a free loadout?
Yes. Our free-loadout run, meaning a limited backpack and no safe pockets, still extracted with 86,000 credits and an epic rarity trinket found in the very first locker we opened. That result suggests the route’s value comes from the locations themselves, not from bringing expensive gear into the raid.
Are red lockers worth looting on Spaceport?
Red lockers on this route consistently produced high-value pulls for us, including mixtapes, blueprints, and gun parts, on top of what the security lockers gave up. They’re easy to skip in favor of rushing security spawns, but we treat them as core stops, not optional ones.
What does the Security Breach skill add to this route?
Security Breach lets you force open security lockers without a key, which on this route meant chaining multiple locker rooms back to back. Our best-documented run used Security Breach and ended with 150,000 credits and several epic-tier drops, though the route is still solid without the skill.
What’s the biggest risk on this Spaceport route?
Running into another Raider mid-loot inside the Departure or Arrival Building interiors is the main risk, since close-quarters rooms leave little room to maneuver. Keeping a flashlight off while looting and staying aware of breach sounds from other players are the two habits that kept our fights to a minimum.
How many extraction points does this route rely on?
Two nearby extracts anchor this route, which is what keeps it lower-risk than routes built around a single far-off extraction point. If one extract becomes contested, the second gives a fallback without a long rotation across open ground.